How to Add Permissions required for CloudMonitor to access M365 data
Step 1
Section titled “Step 1”Navigate to https://portal.azure.com/#home
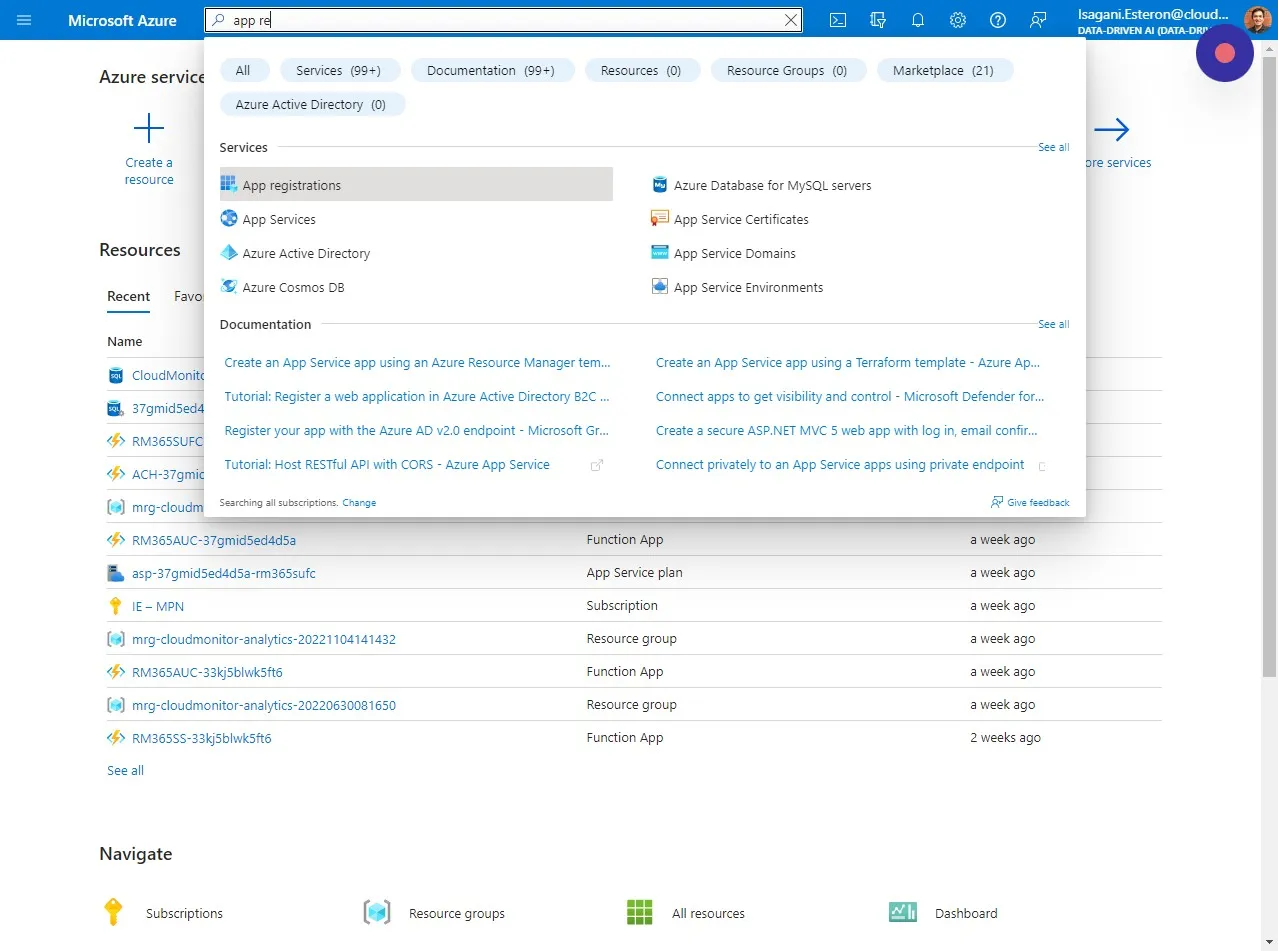
Step 2
Section titled “Step 2”In your Azure Portal head over to App registrations. You can easily do this by searching for “App registrations” in the search box.
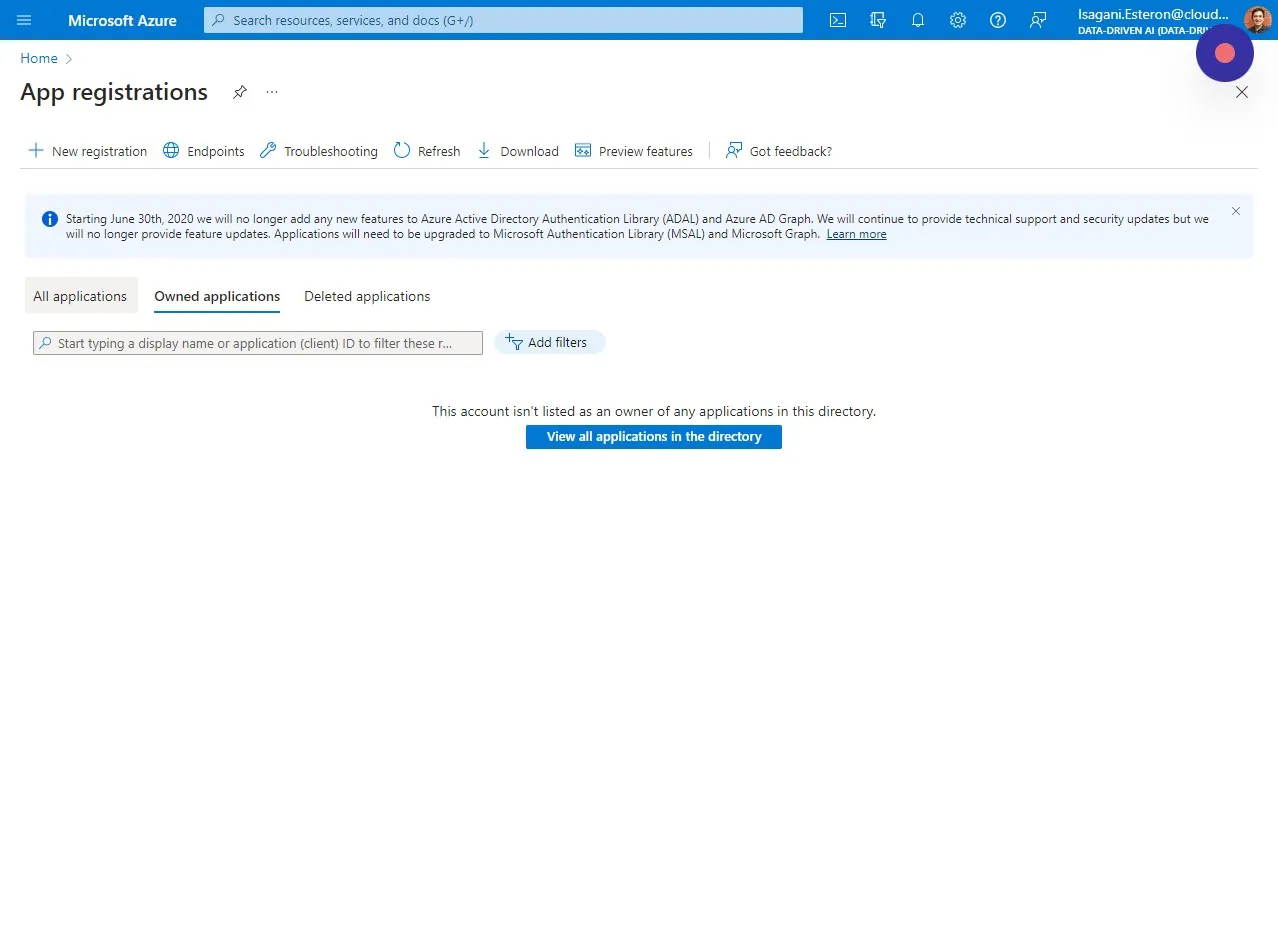
Step 3
Section titled “Step 3”Click “All applications”
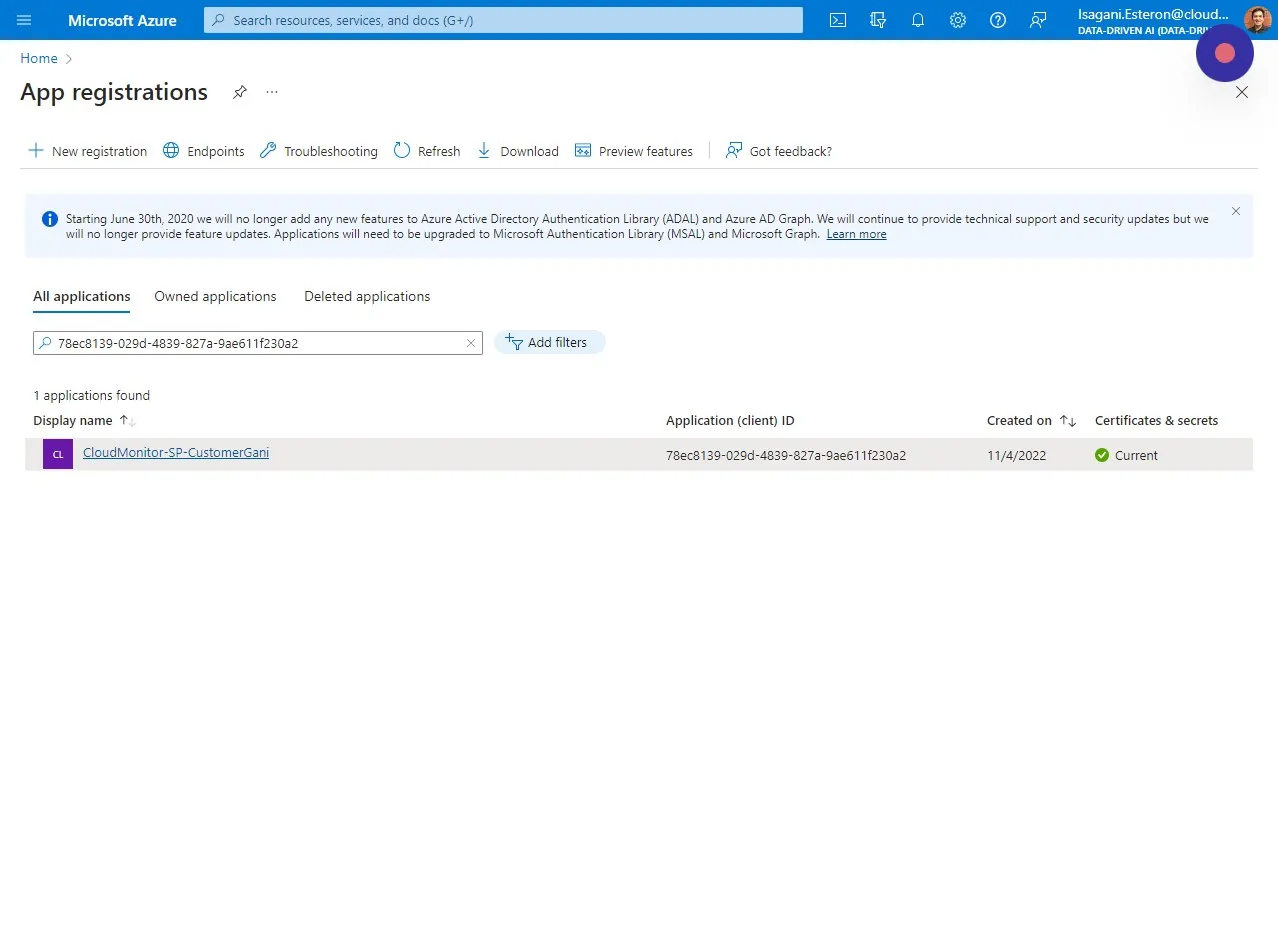
Step 4
Section titled “Step 4”Choose the Service Principal you created for CloudMonitor. You can type in the Name or Application (client) ID. In this example we’re using “CloudMonitor-SP-CustomerGani”
Step 5
Section titled “Step 5”Click “API permissions”

Step 6
Section titled “Step 6”Under the “Microsoft APIs” tab, click “Microsoft Graph”

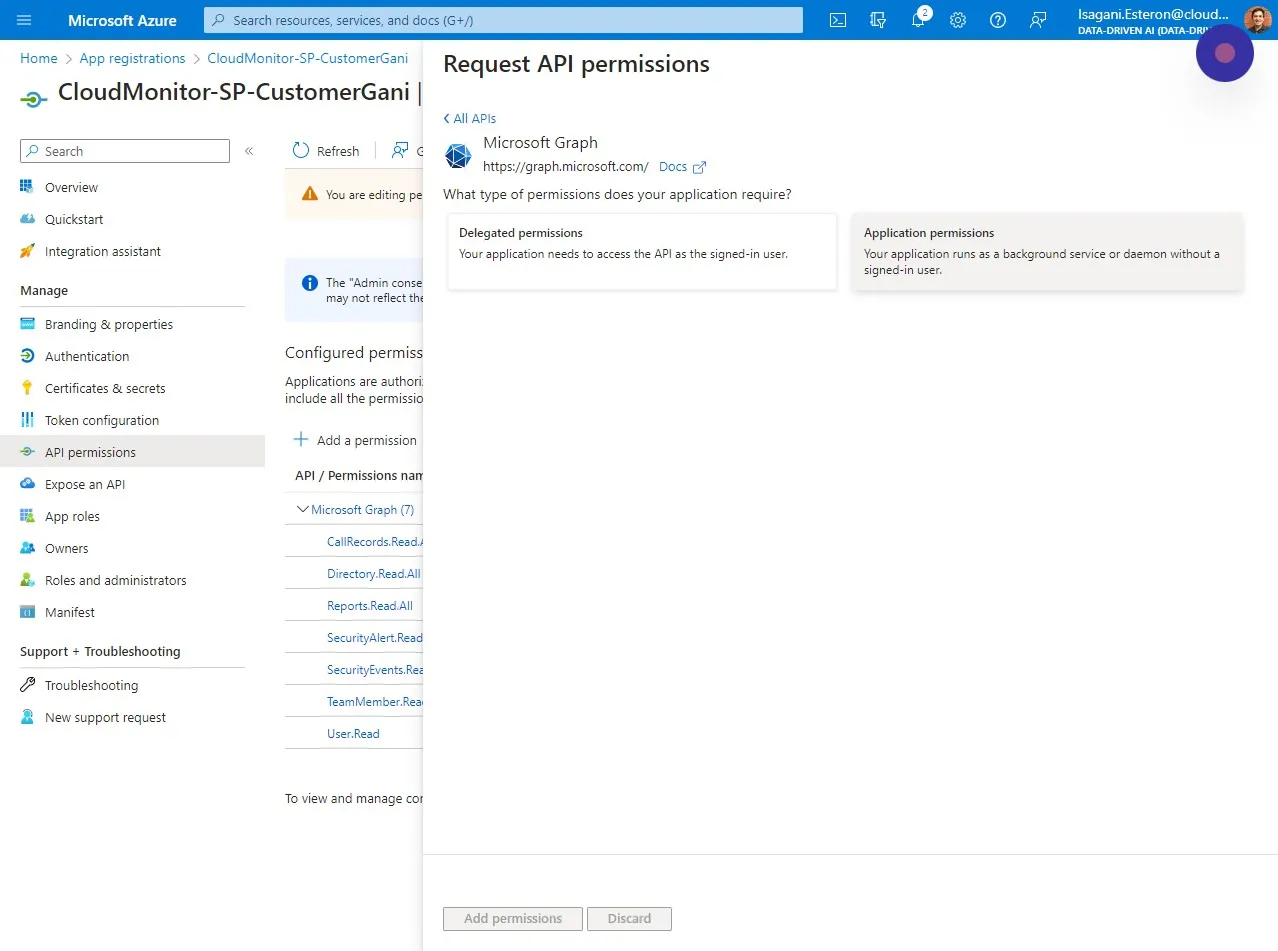
Step 7
Section titled “Step 7”Click “Application permissions”.
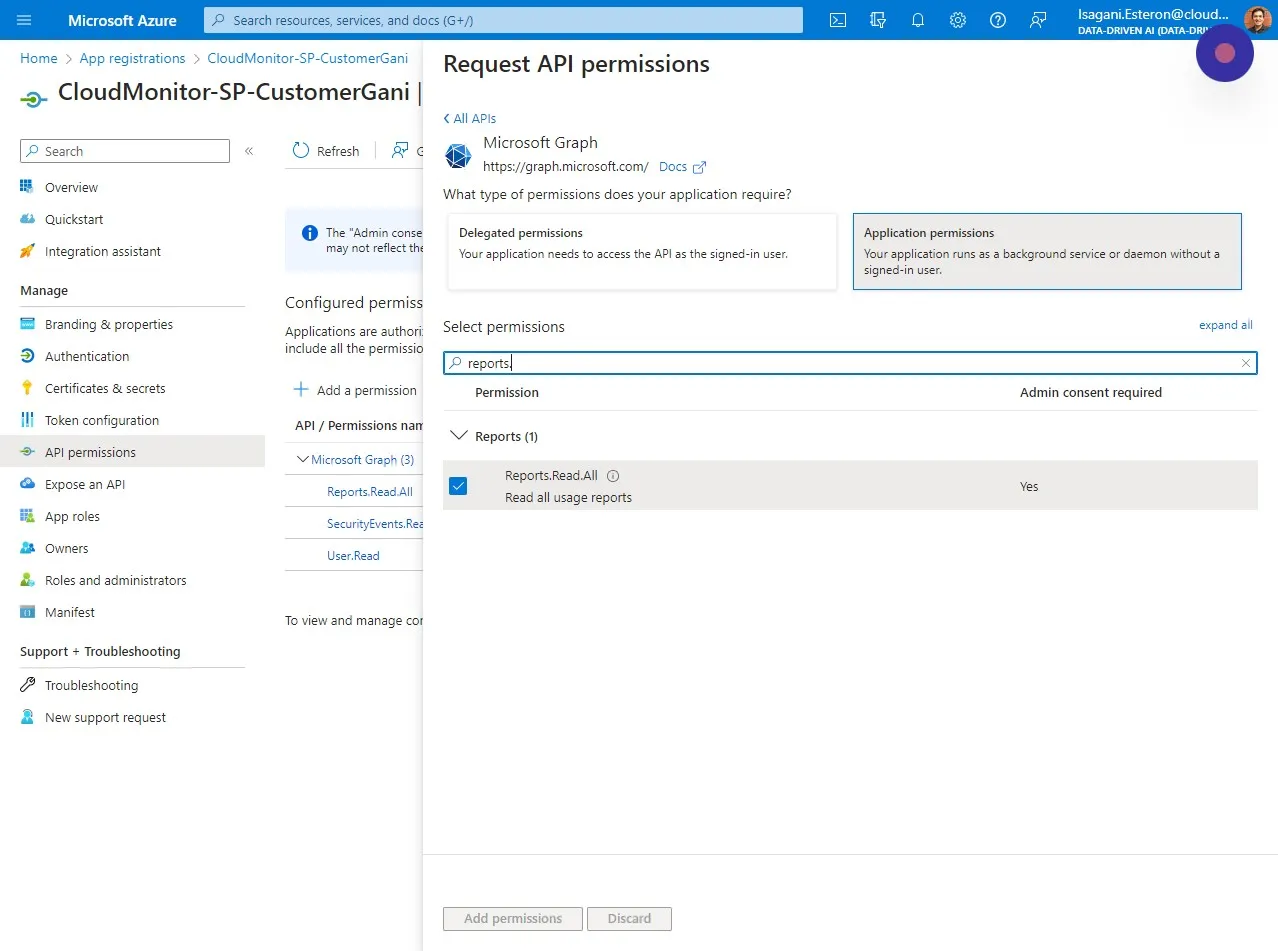
Step 8
Section titled “Step 8”Search and check all the following permission: CallRecords.Read.All Directory.Read.All Reports.Read.All SecurityAlert.Read.All SecurityEvents.Read.All TeamMember.Read.All
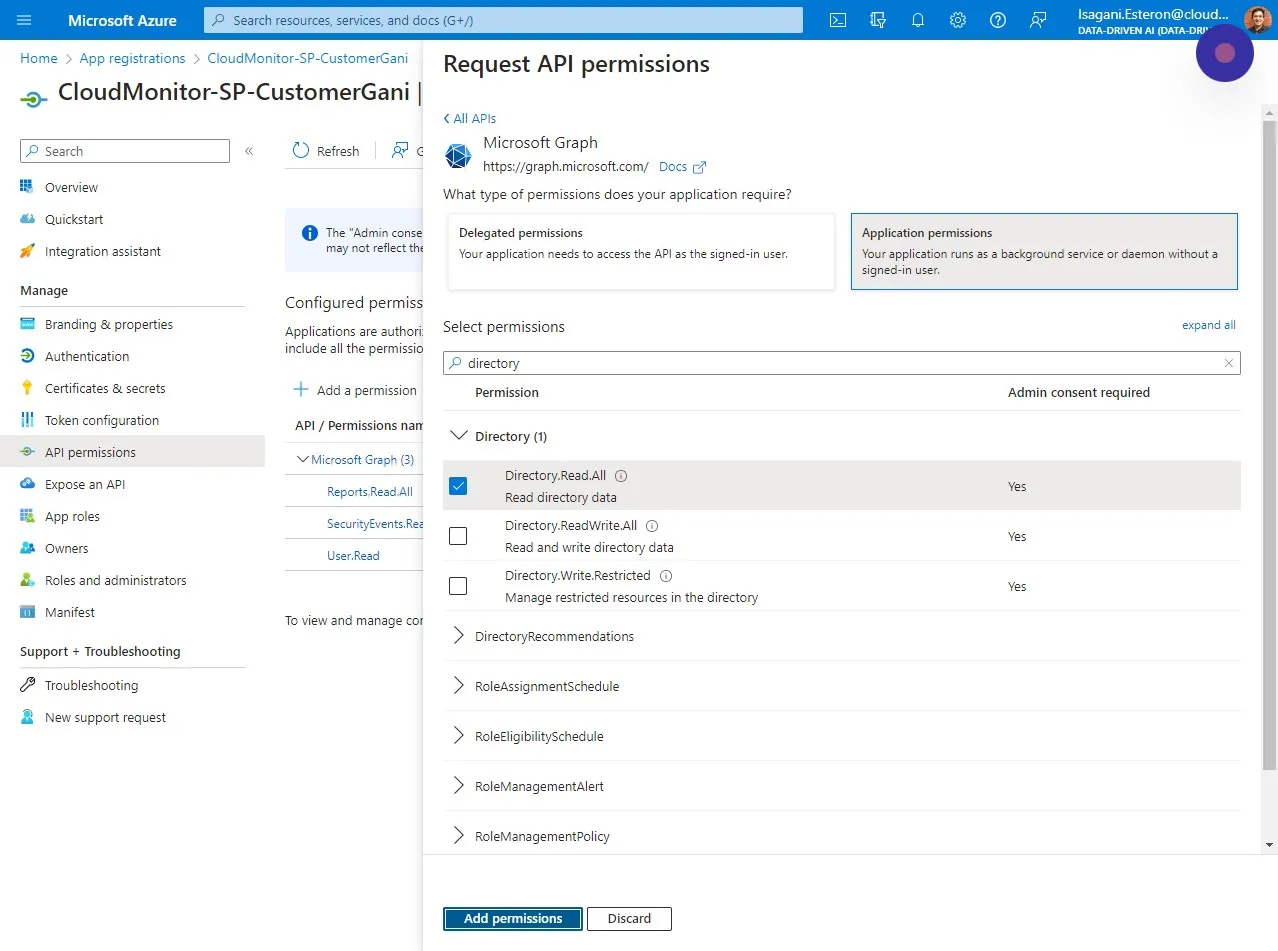
Step 9
Section titled “Step 9”After checking all permissions listed above click “Add permissions”
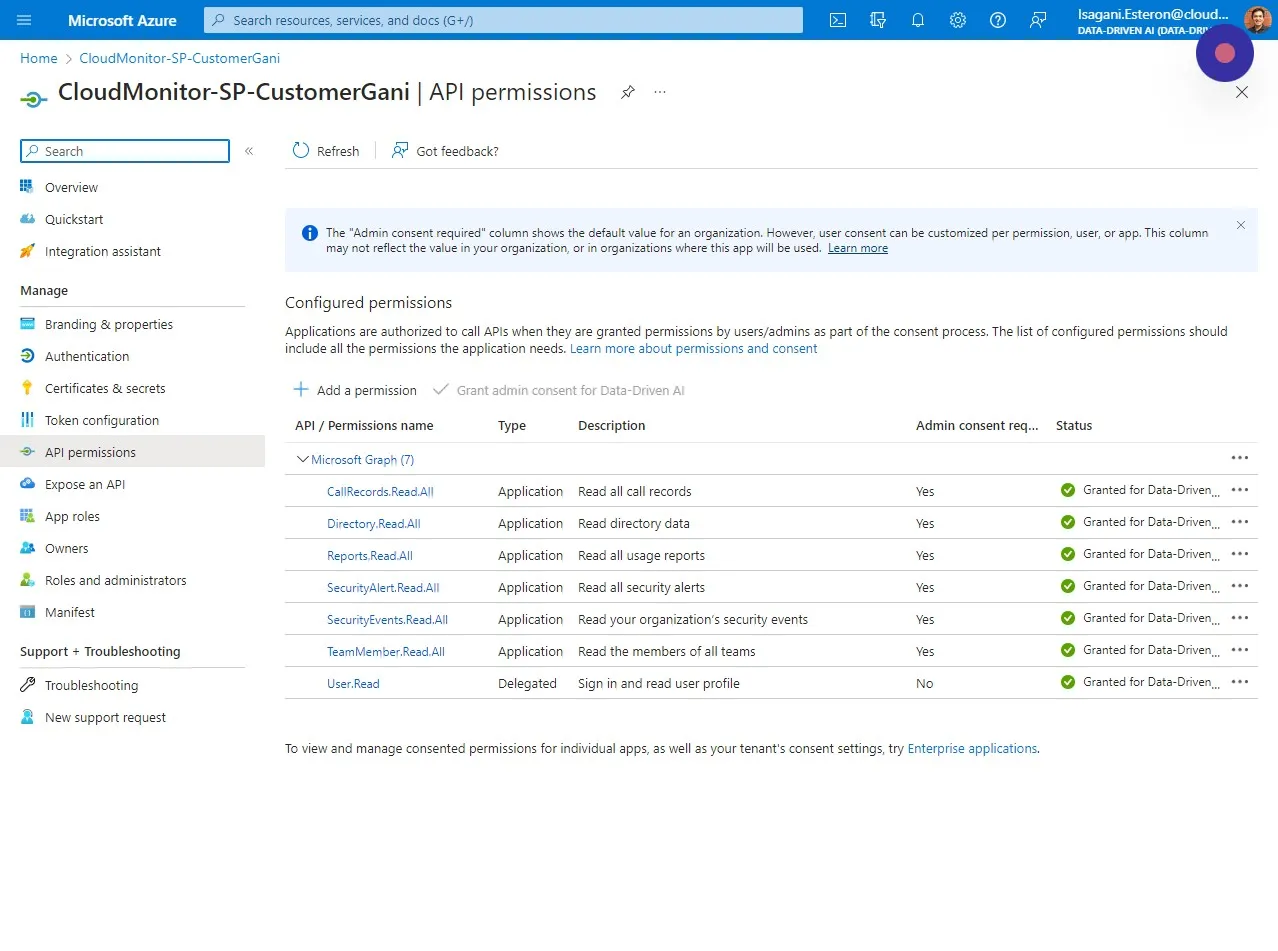
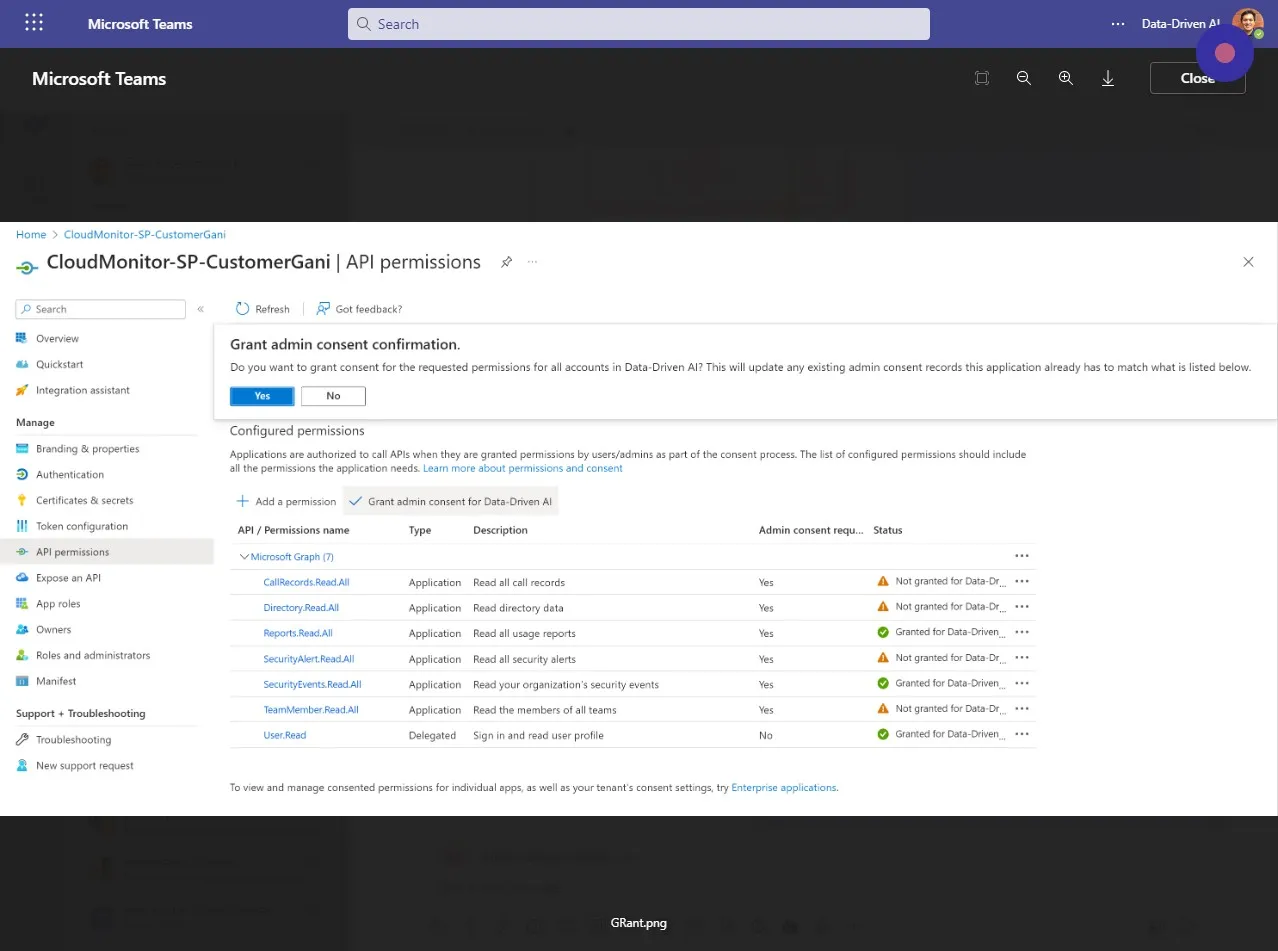
Step 10
Section titled “Step 10”This is a screenshot of what the Admin will see when granting consent.
*Only for Admins
Step 11
Section titled “Step 11”After the new permissions are granted by the Admin, it should look like this.