Step 6: Configuring the Service Principal for Admin App Access
In order to be able to log in to the Admin App and create Cost Groups and remediate recommendations, you need to first configure the Service Principal. Click on Get Started below to follow the walkthrough.
Step 1
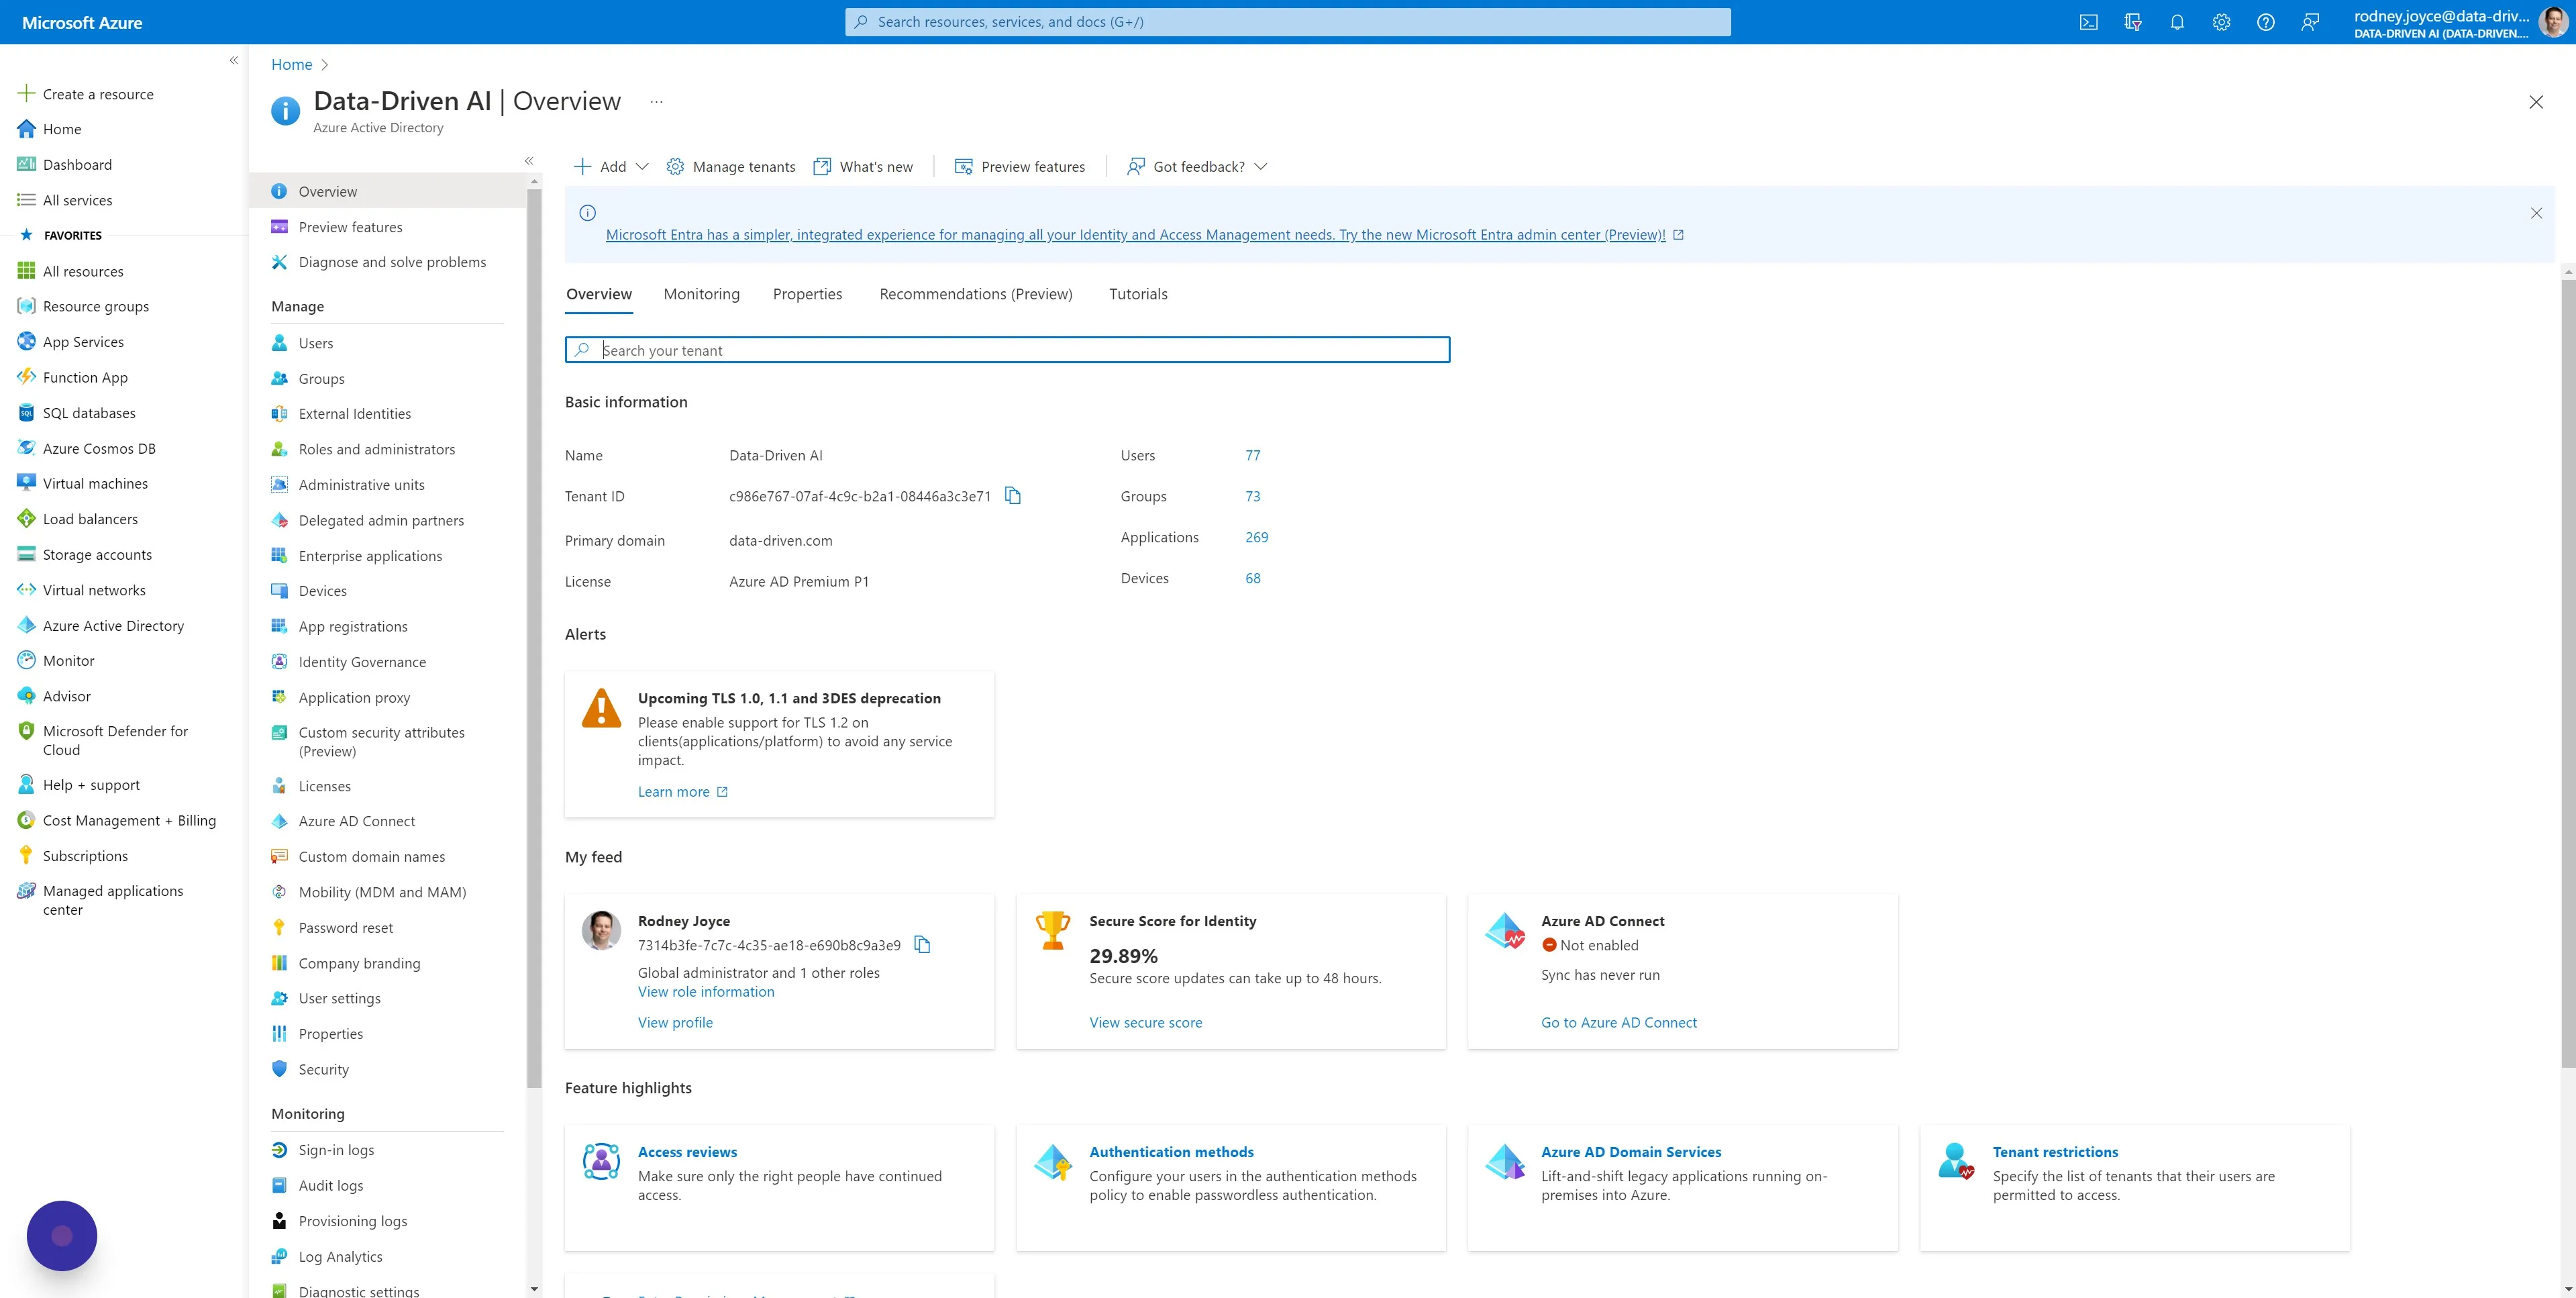
Section titled “Step 1”Open your Azure Portal in a new browser window (portal.azure.com).
You need to be logged into Azure as an Active Directory Administrator. Open “Microsoft Entra ID” (formerly “Azure Active Directory”).

Step 2
Section titled “Step 2”Open the Service Principal (also known as an “App Registration”) that you added previously for CloudMonitor. You can do this by searching for the Service Principal Name or ClientId.
In our case, it is “CloudMonitor-SP”.
Step 3
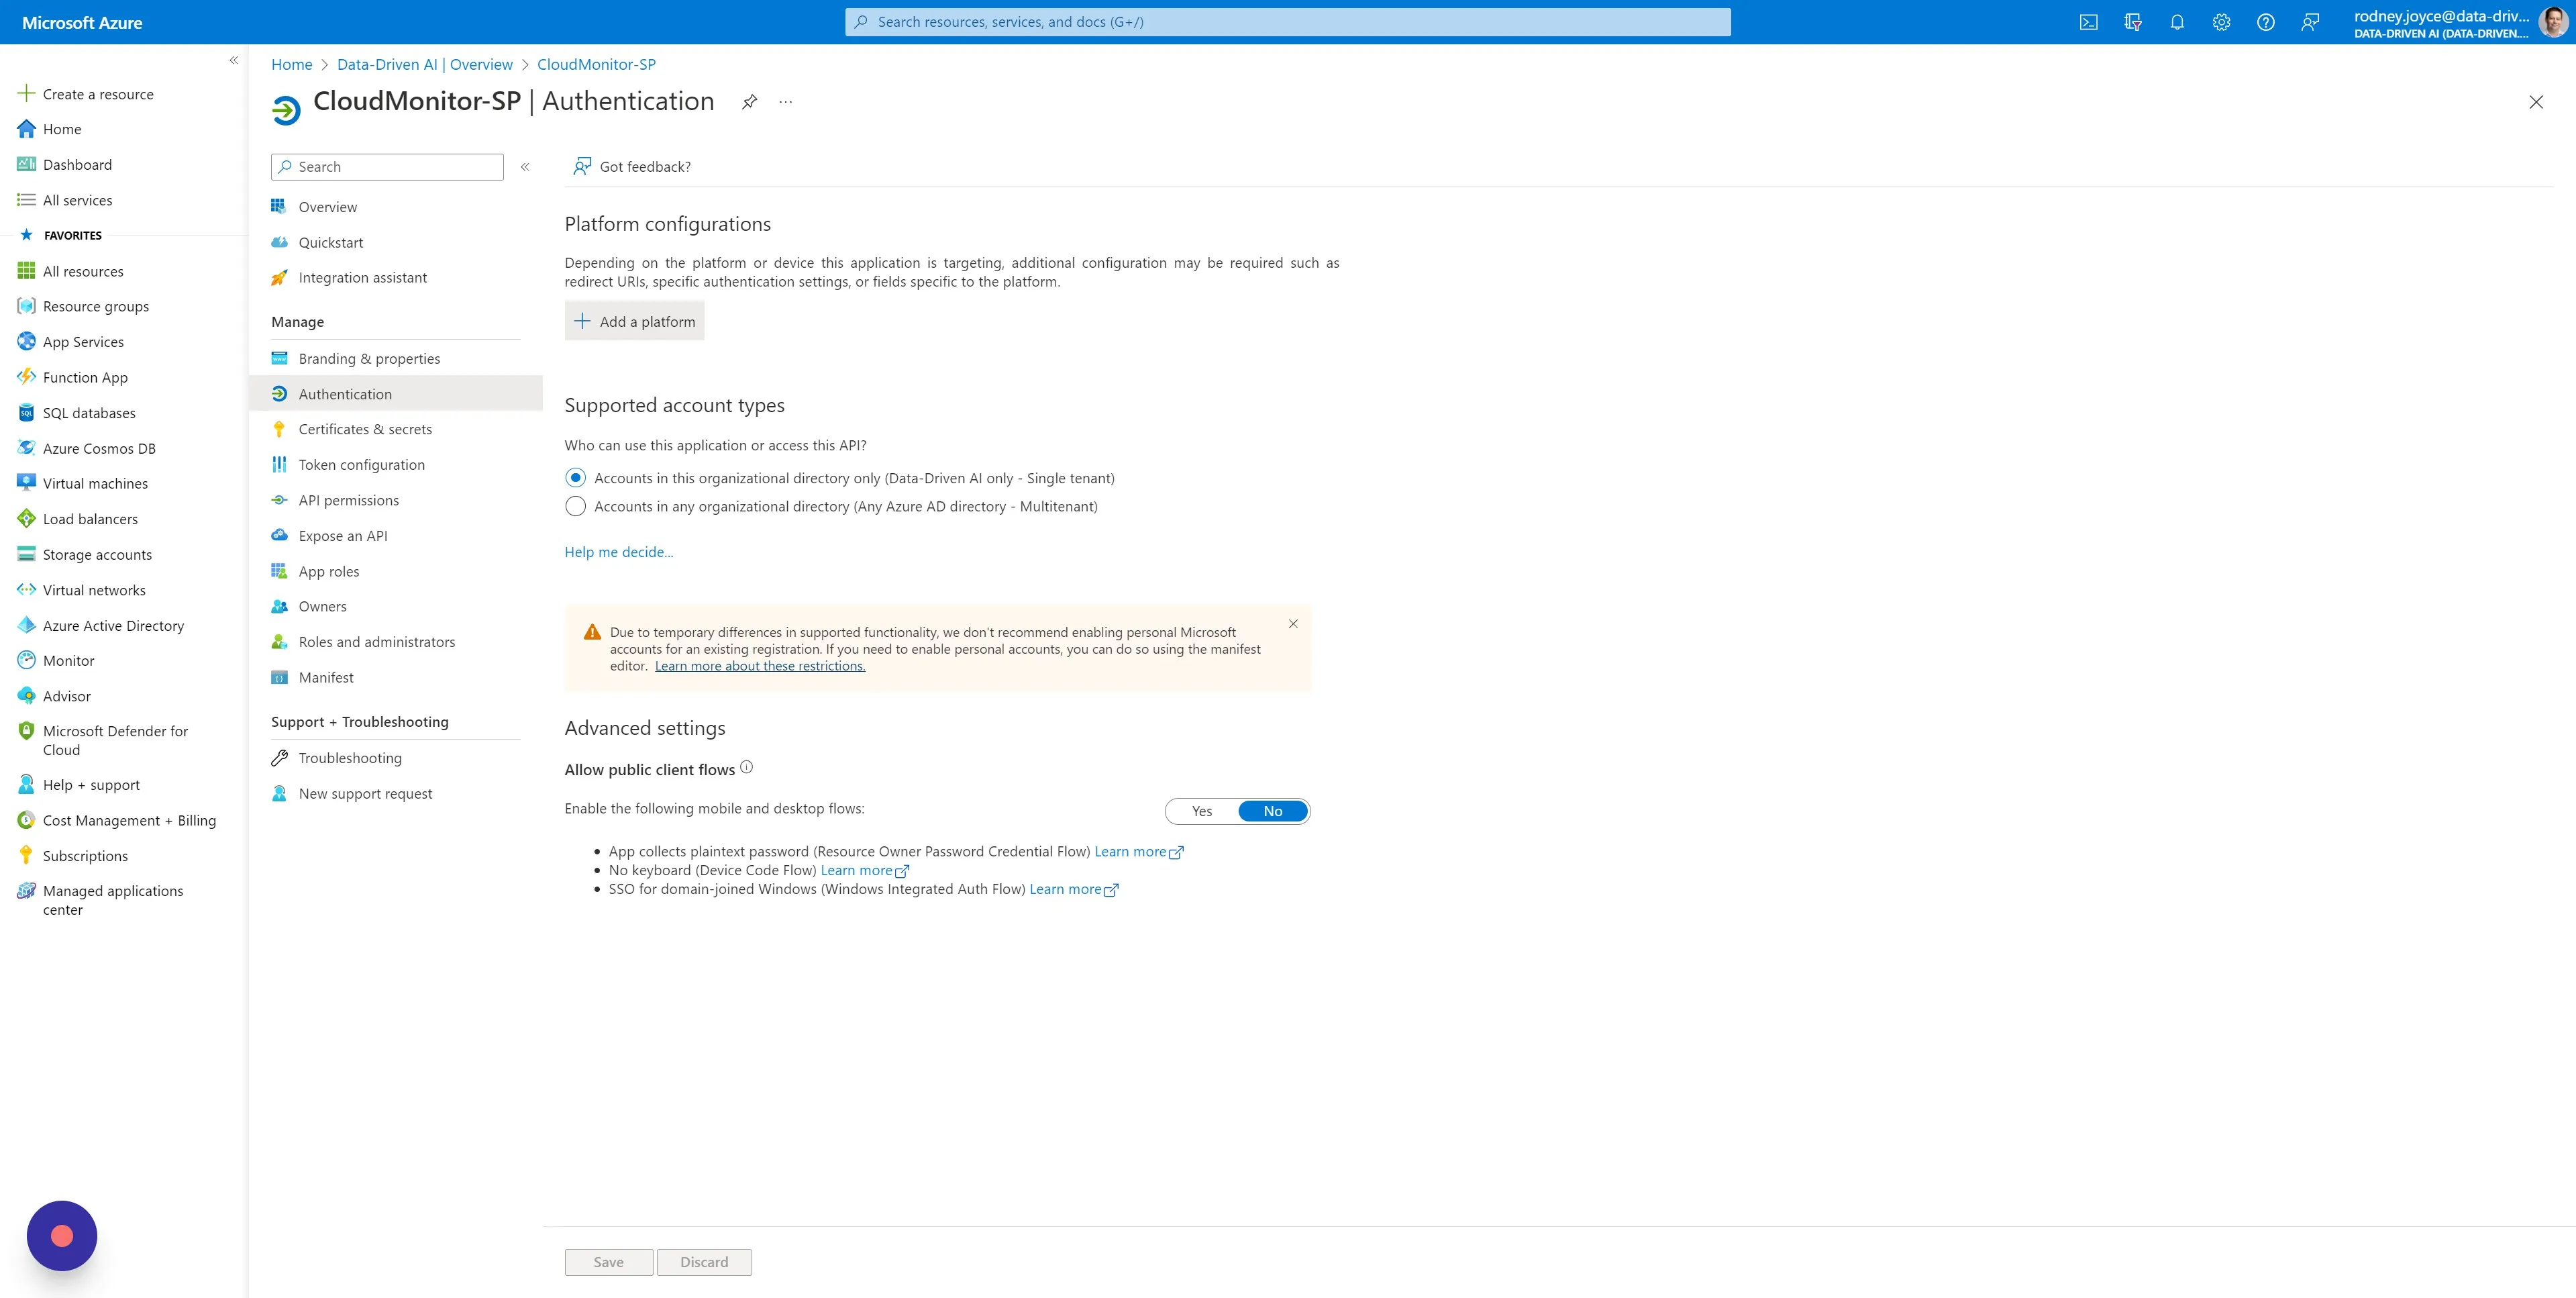
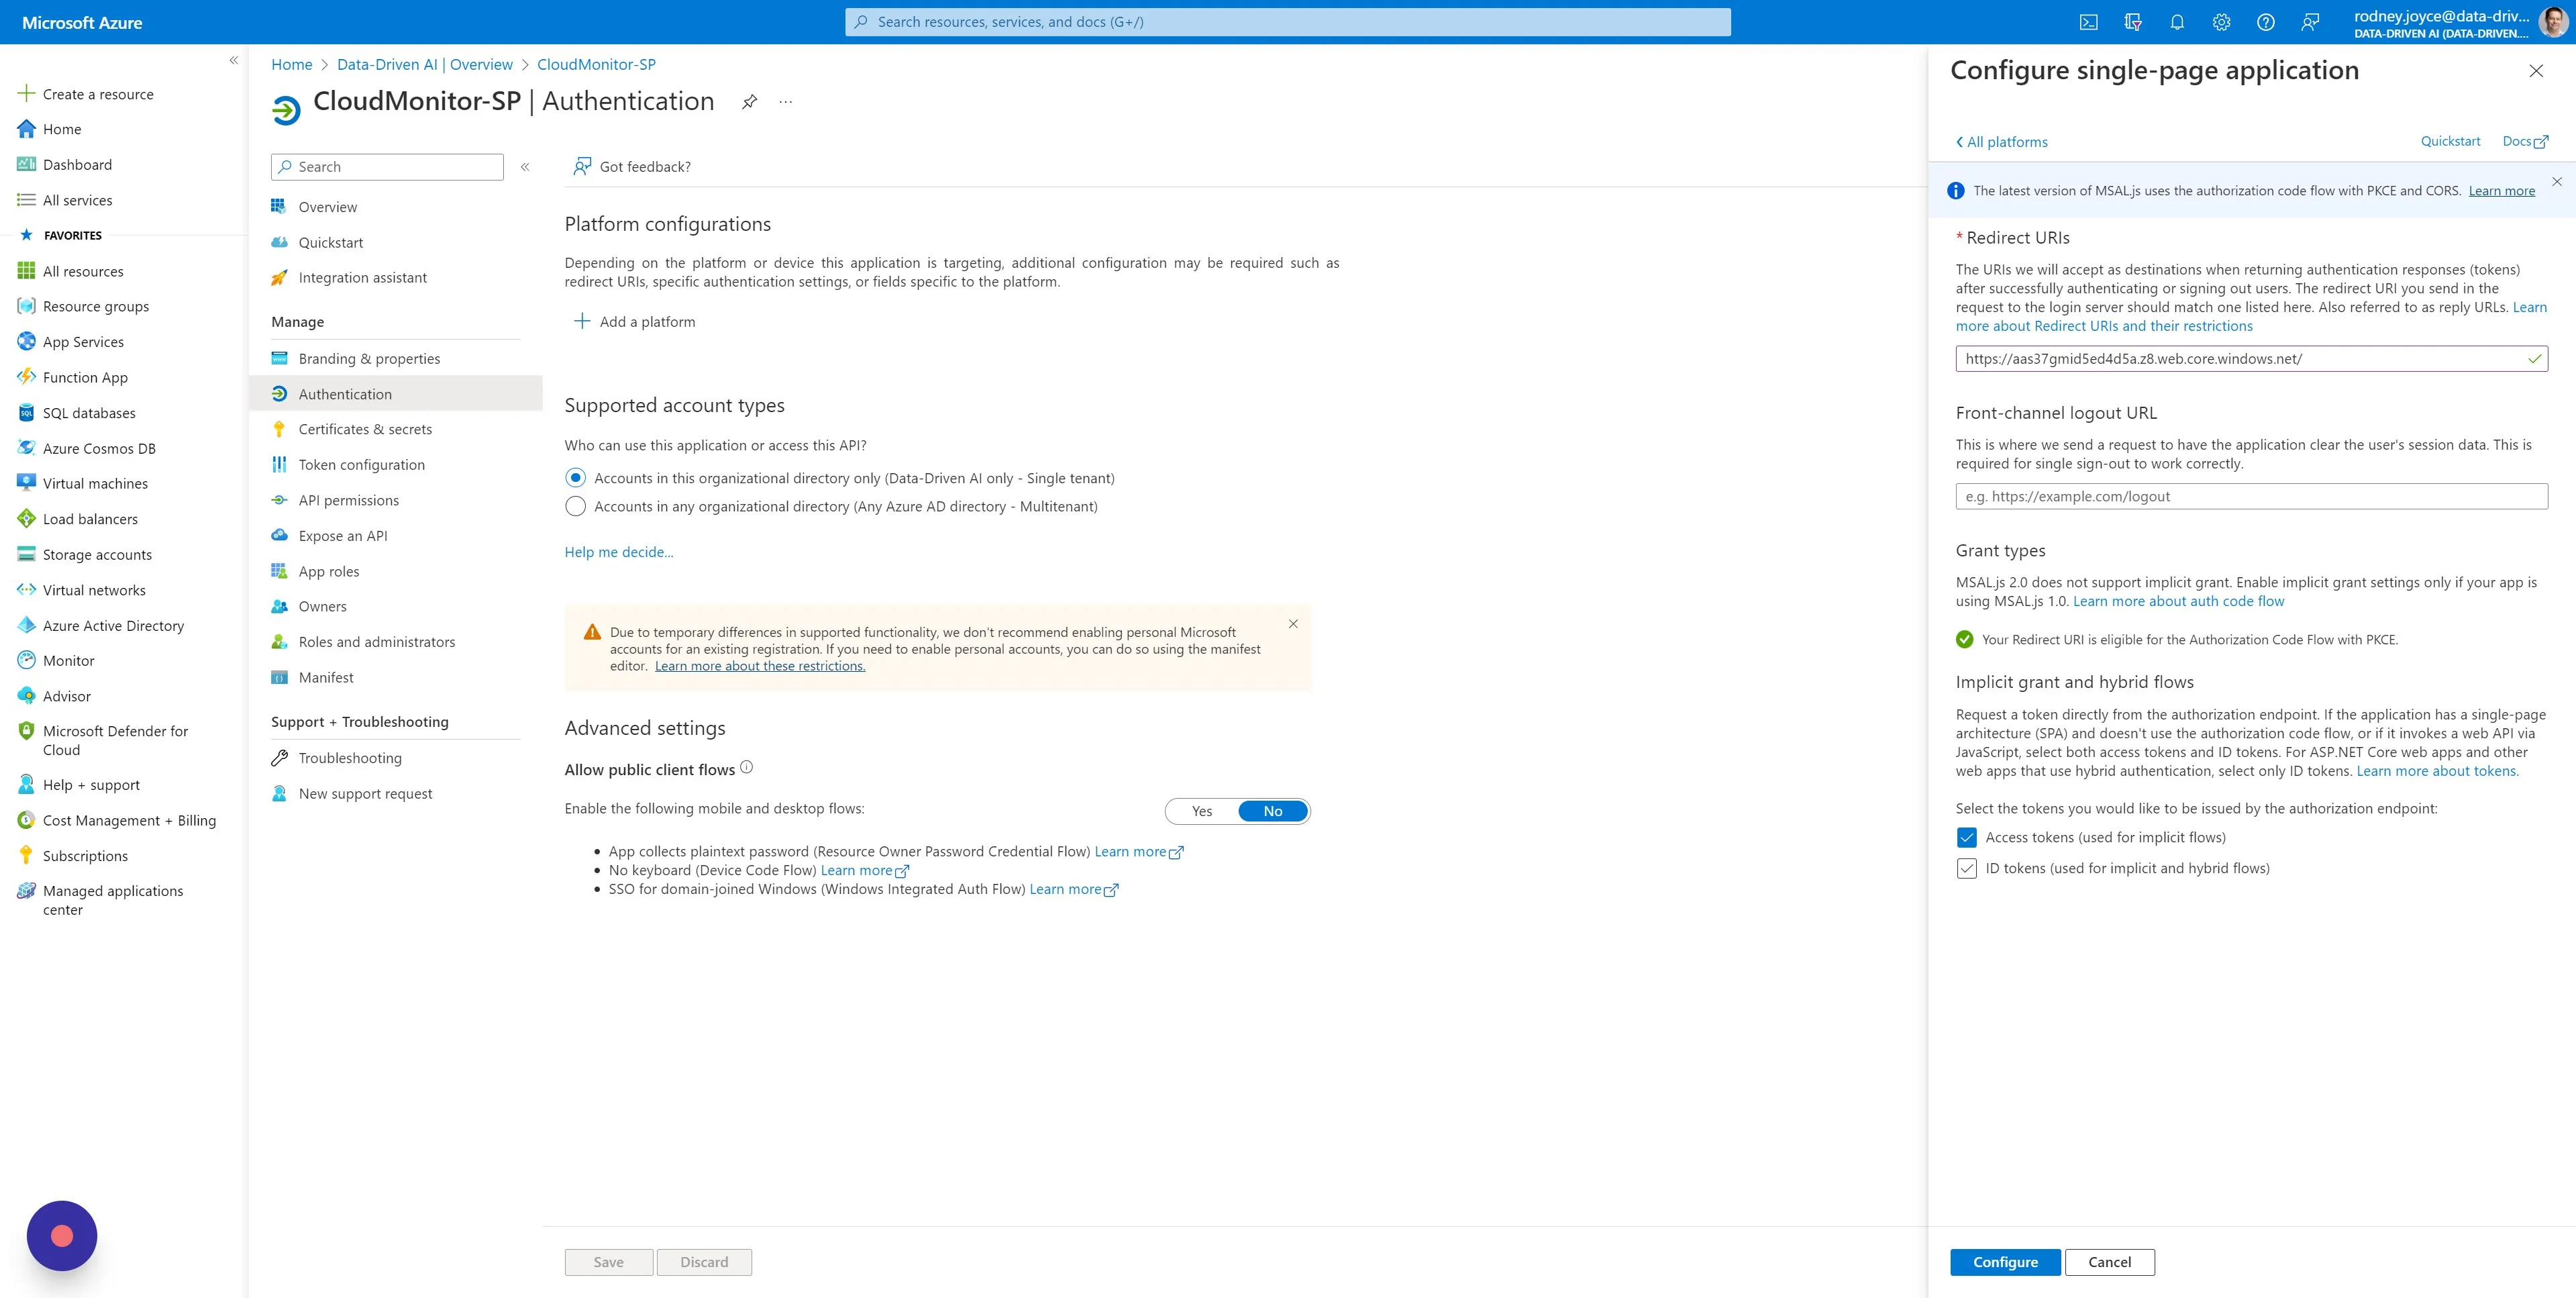
Section titled “Step 3”Once you have the Service Principal open, select “Authentication” in the left menu and click on “Add a platform” and choose “Single-page application”.
Step 4
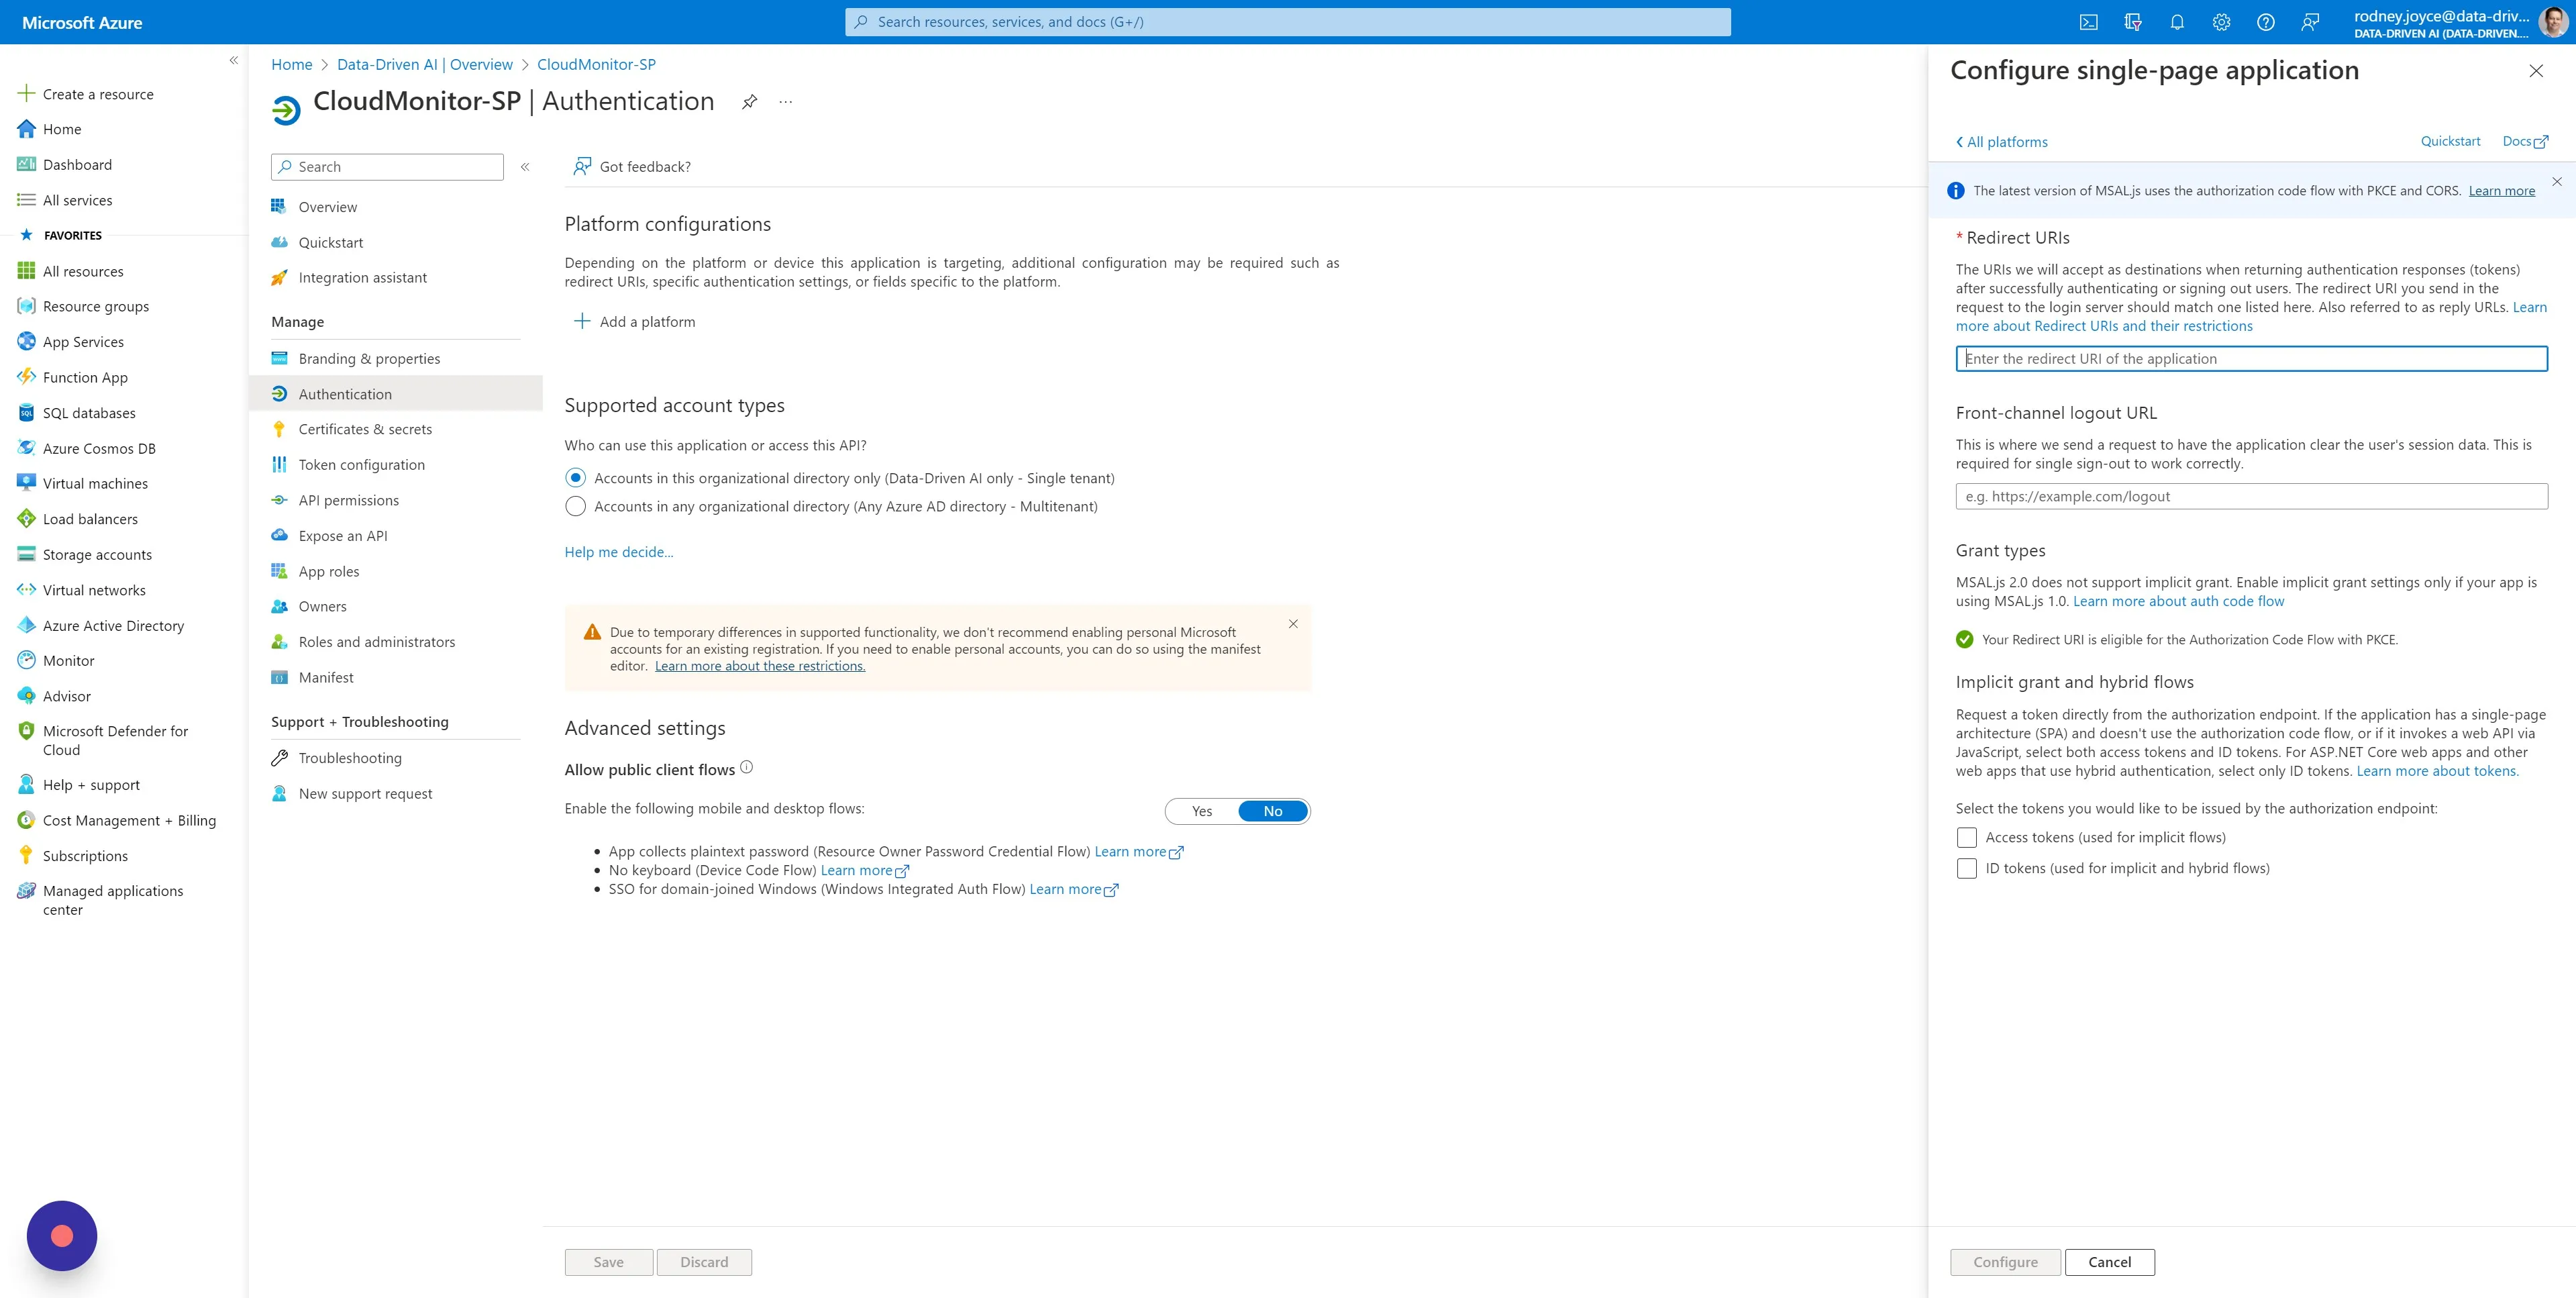
Section titled “Step 4”Copy and paste the Admin App Url provided to you by the CloudMonitor support team into the Redirect URIs. If you do not know what this is, contact Support and we’ll find it for you.
Step 5
Section titled “Step 5”Check both checkboxes for Access Tokens and ID Tokens and ensure that the “Supported account types” option is set to Single Tenant only and save.
Step 6
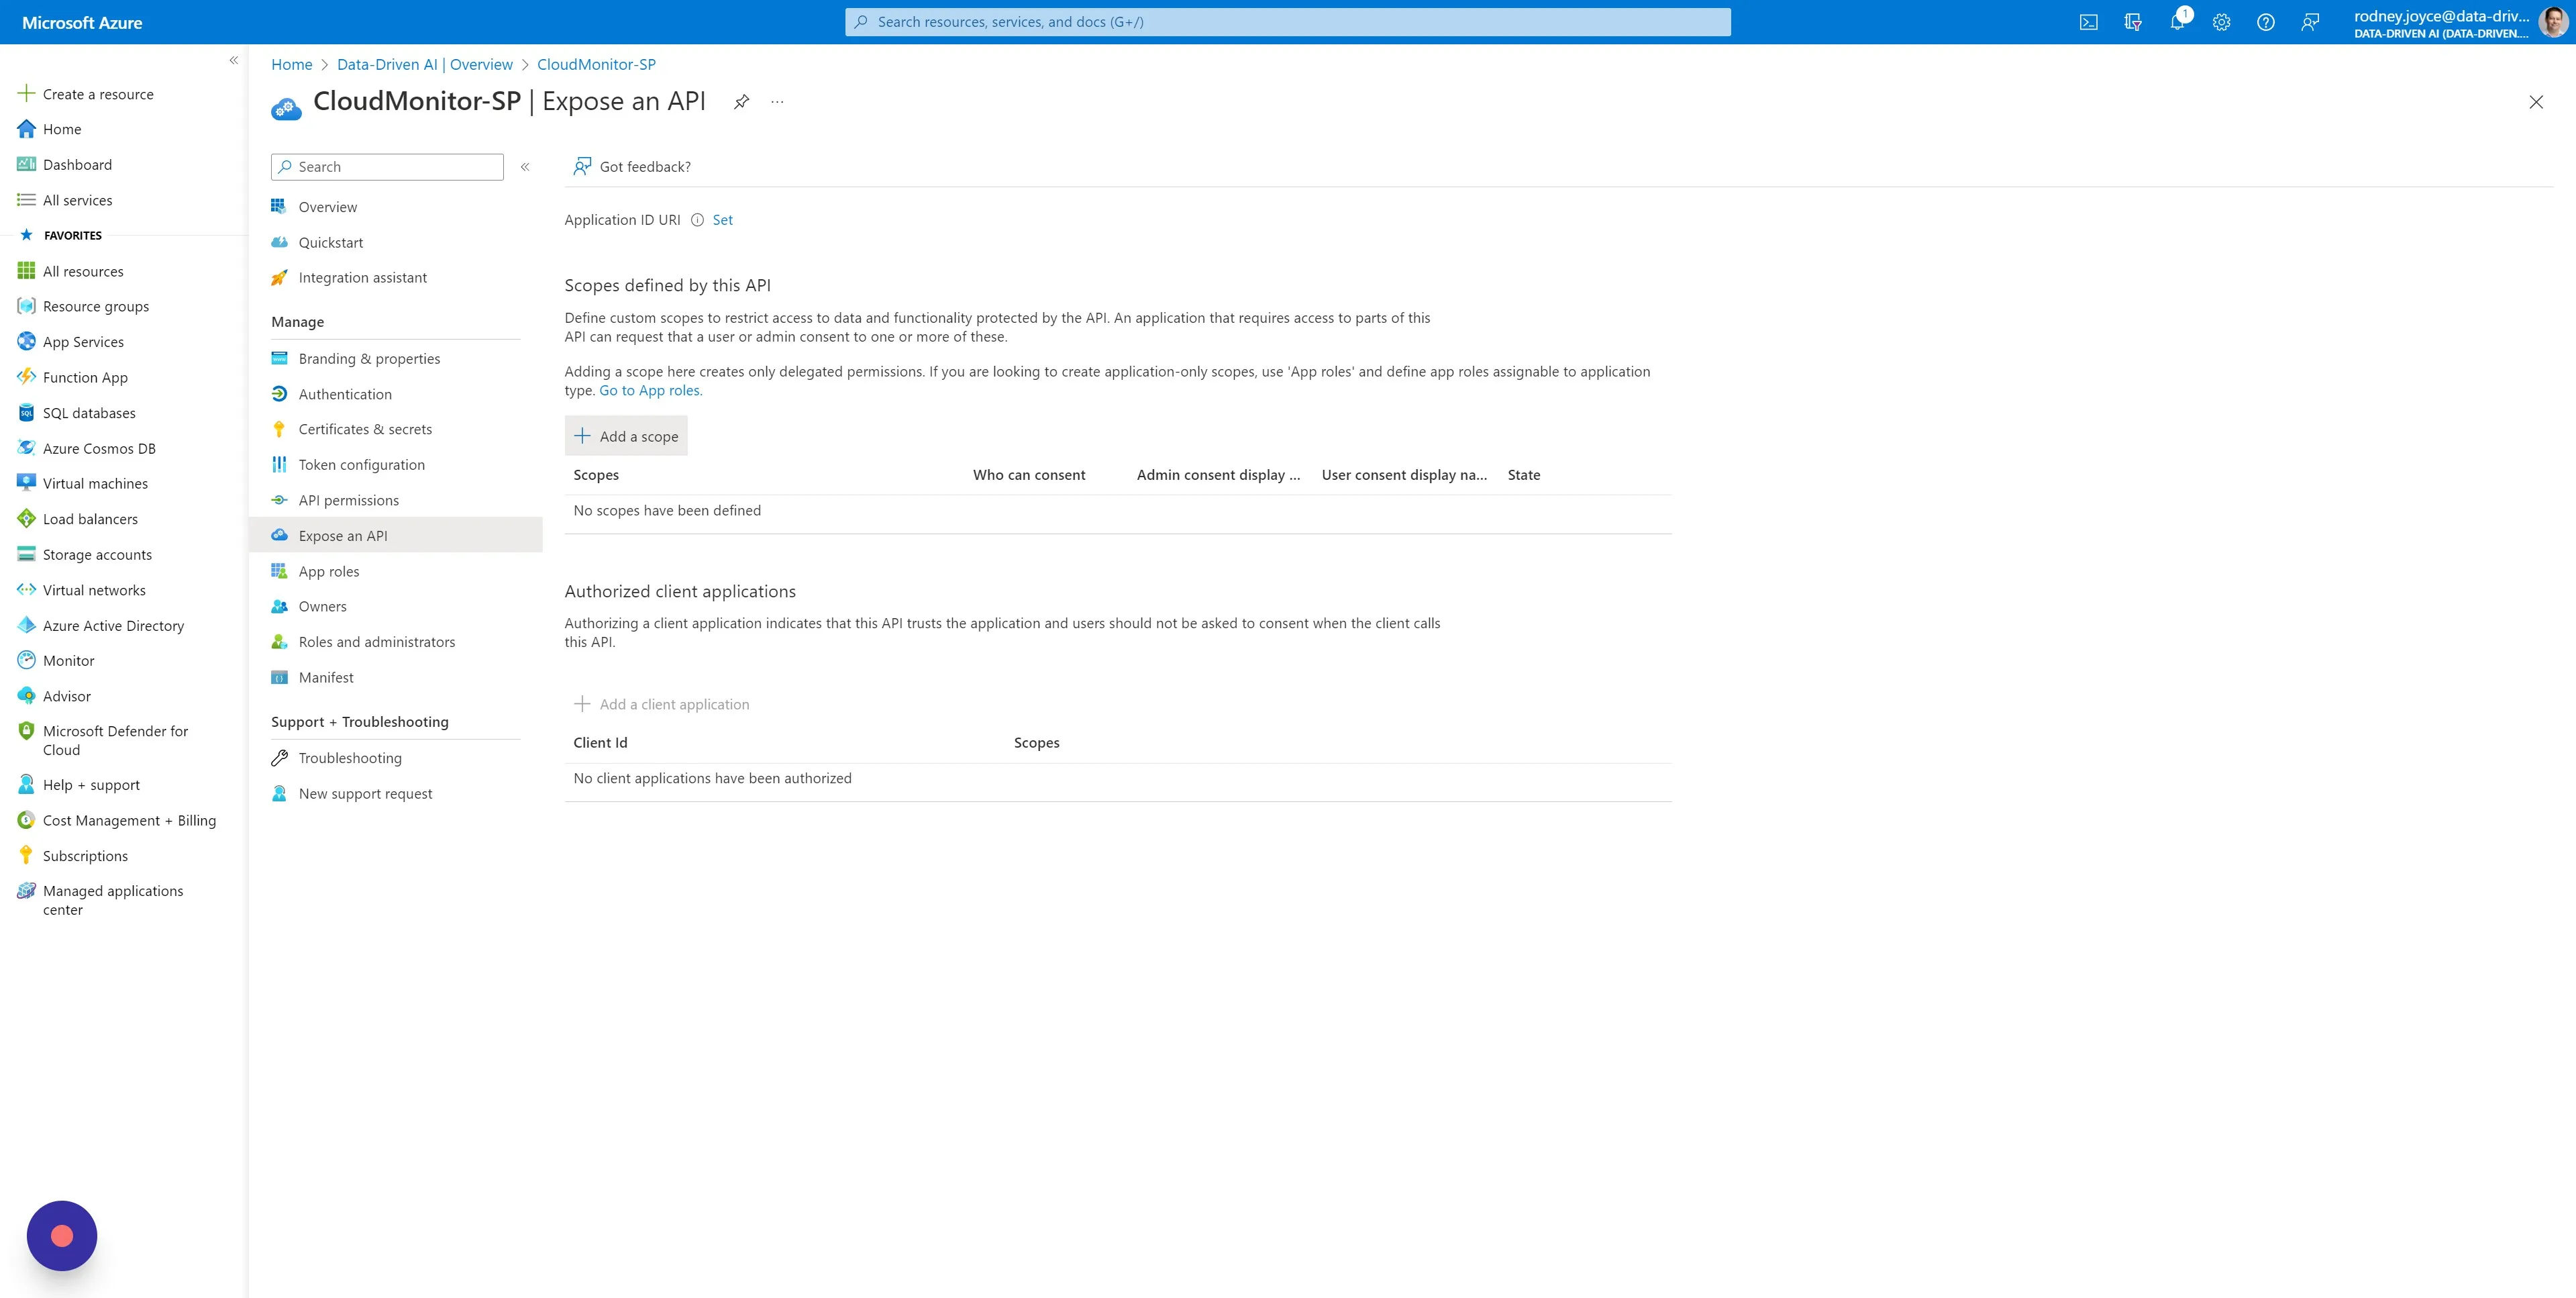
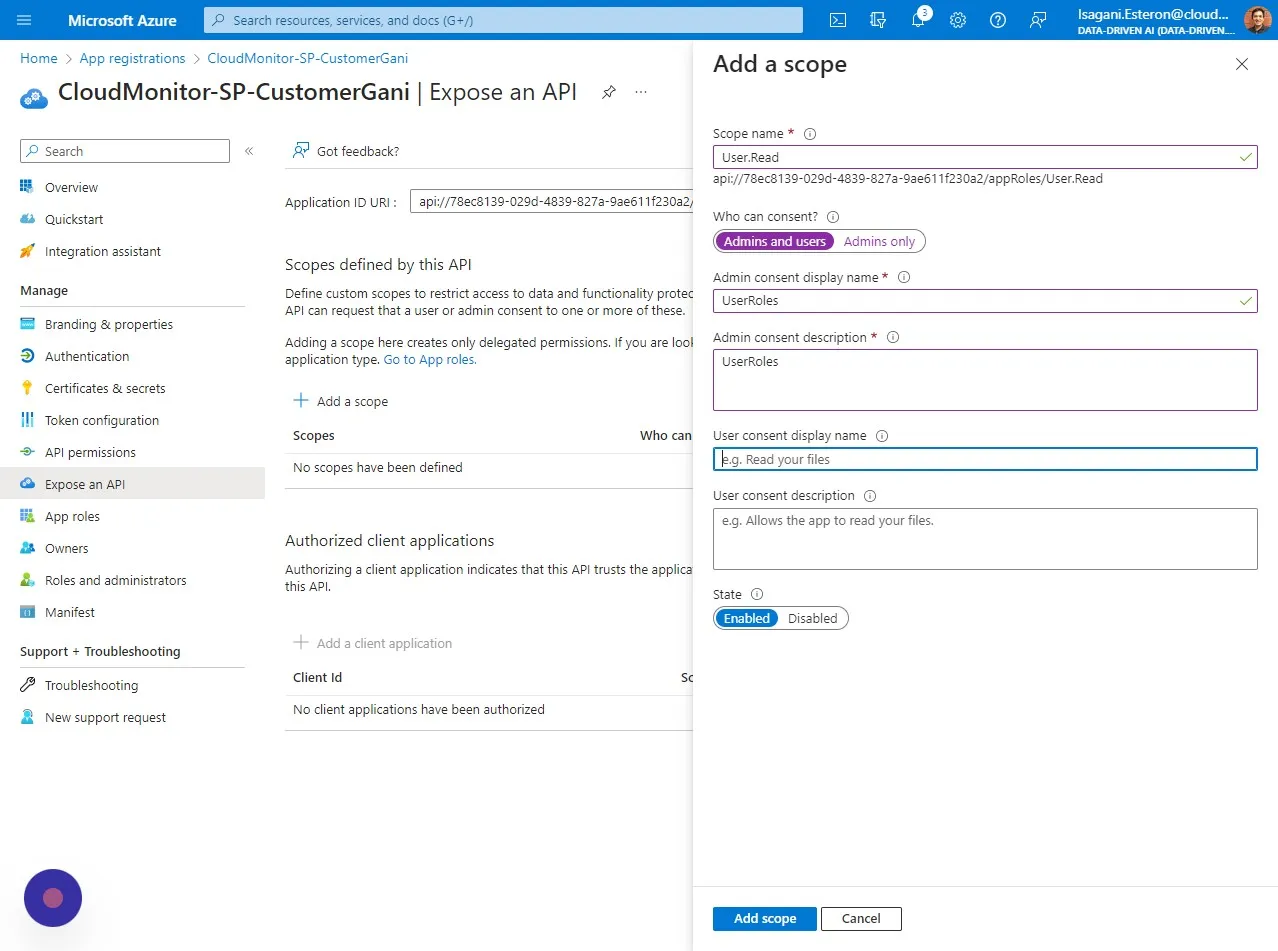
Section titled “Step 6”Then choose “Expose an API” in the left menu and click on “Add a scope”
Step 7
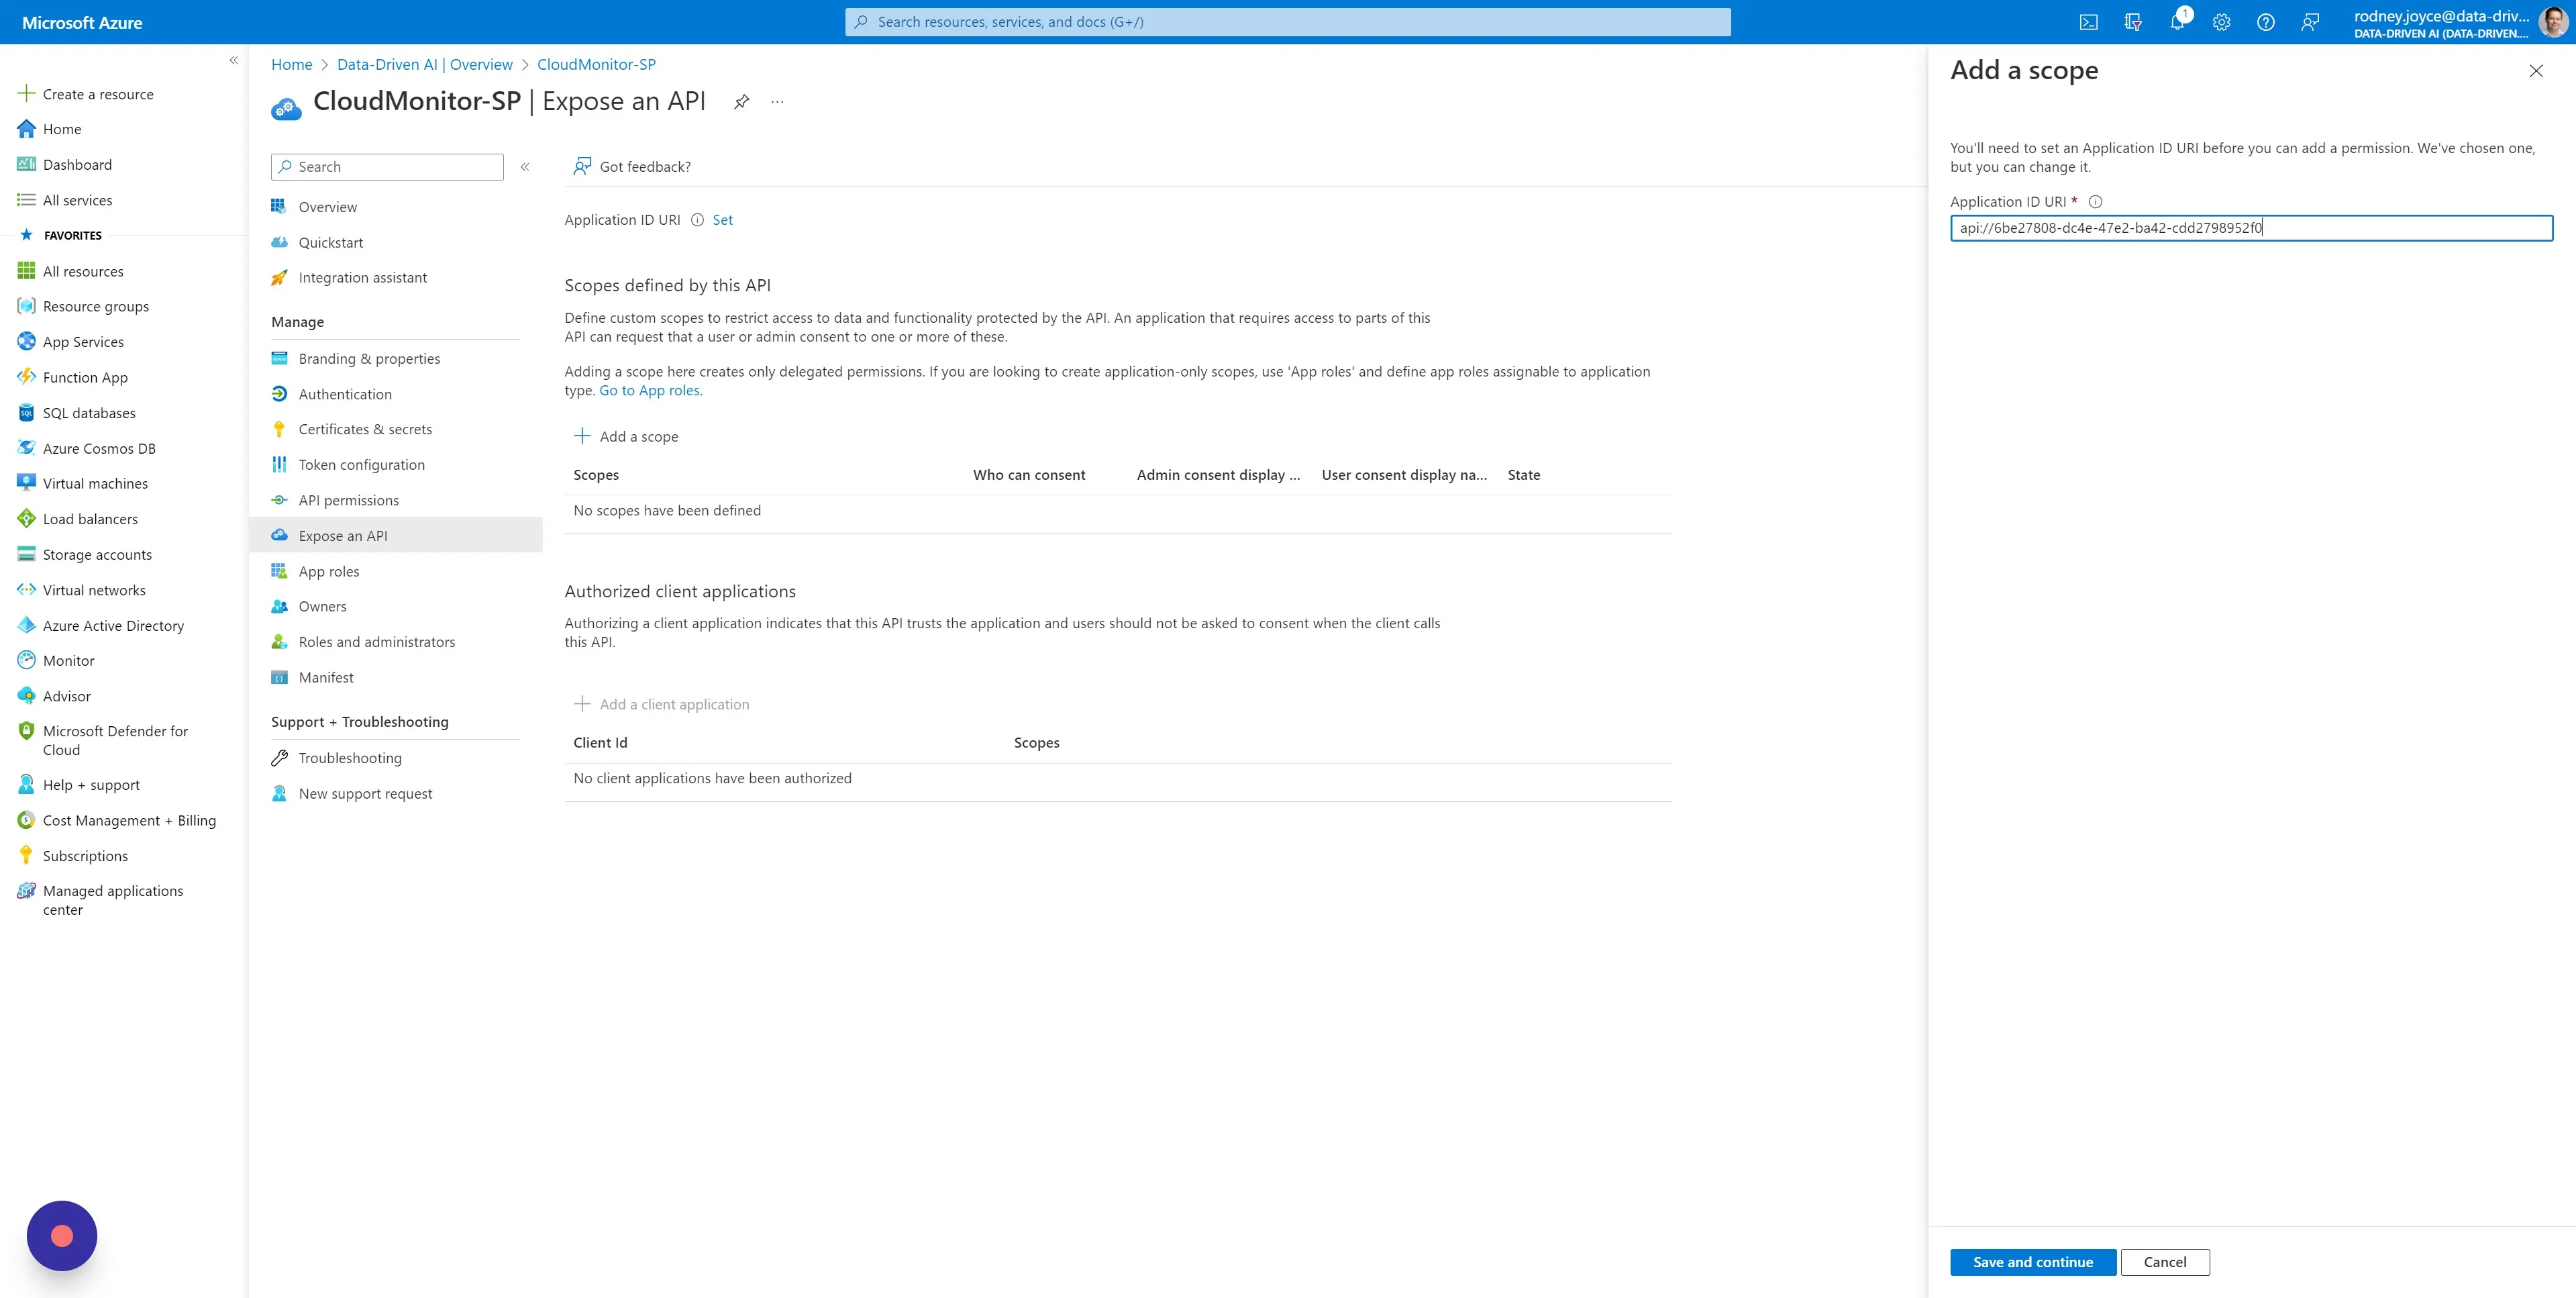
Section titled “Step 7”Add the word “/appRoles” to the end of the Application ID URI (Do not change anything else) and click on “Save and continue”.
Step 8
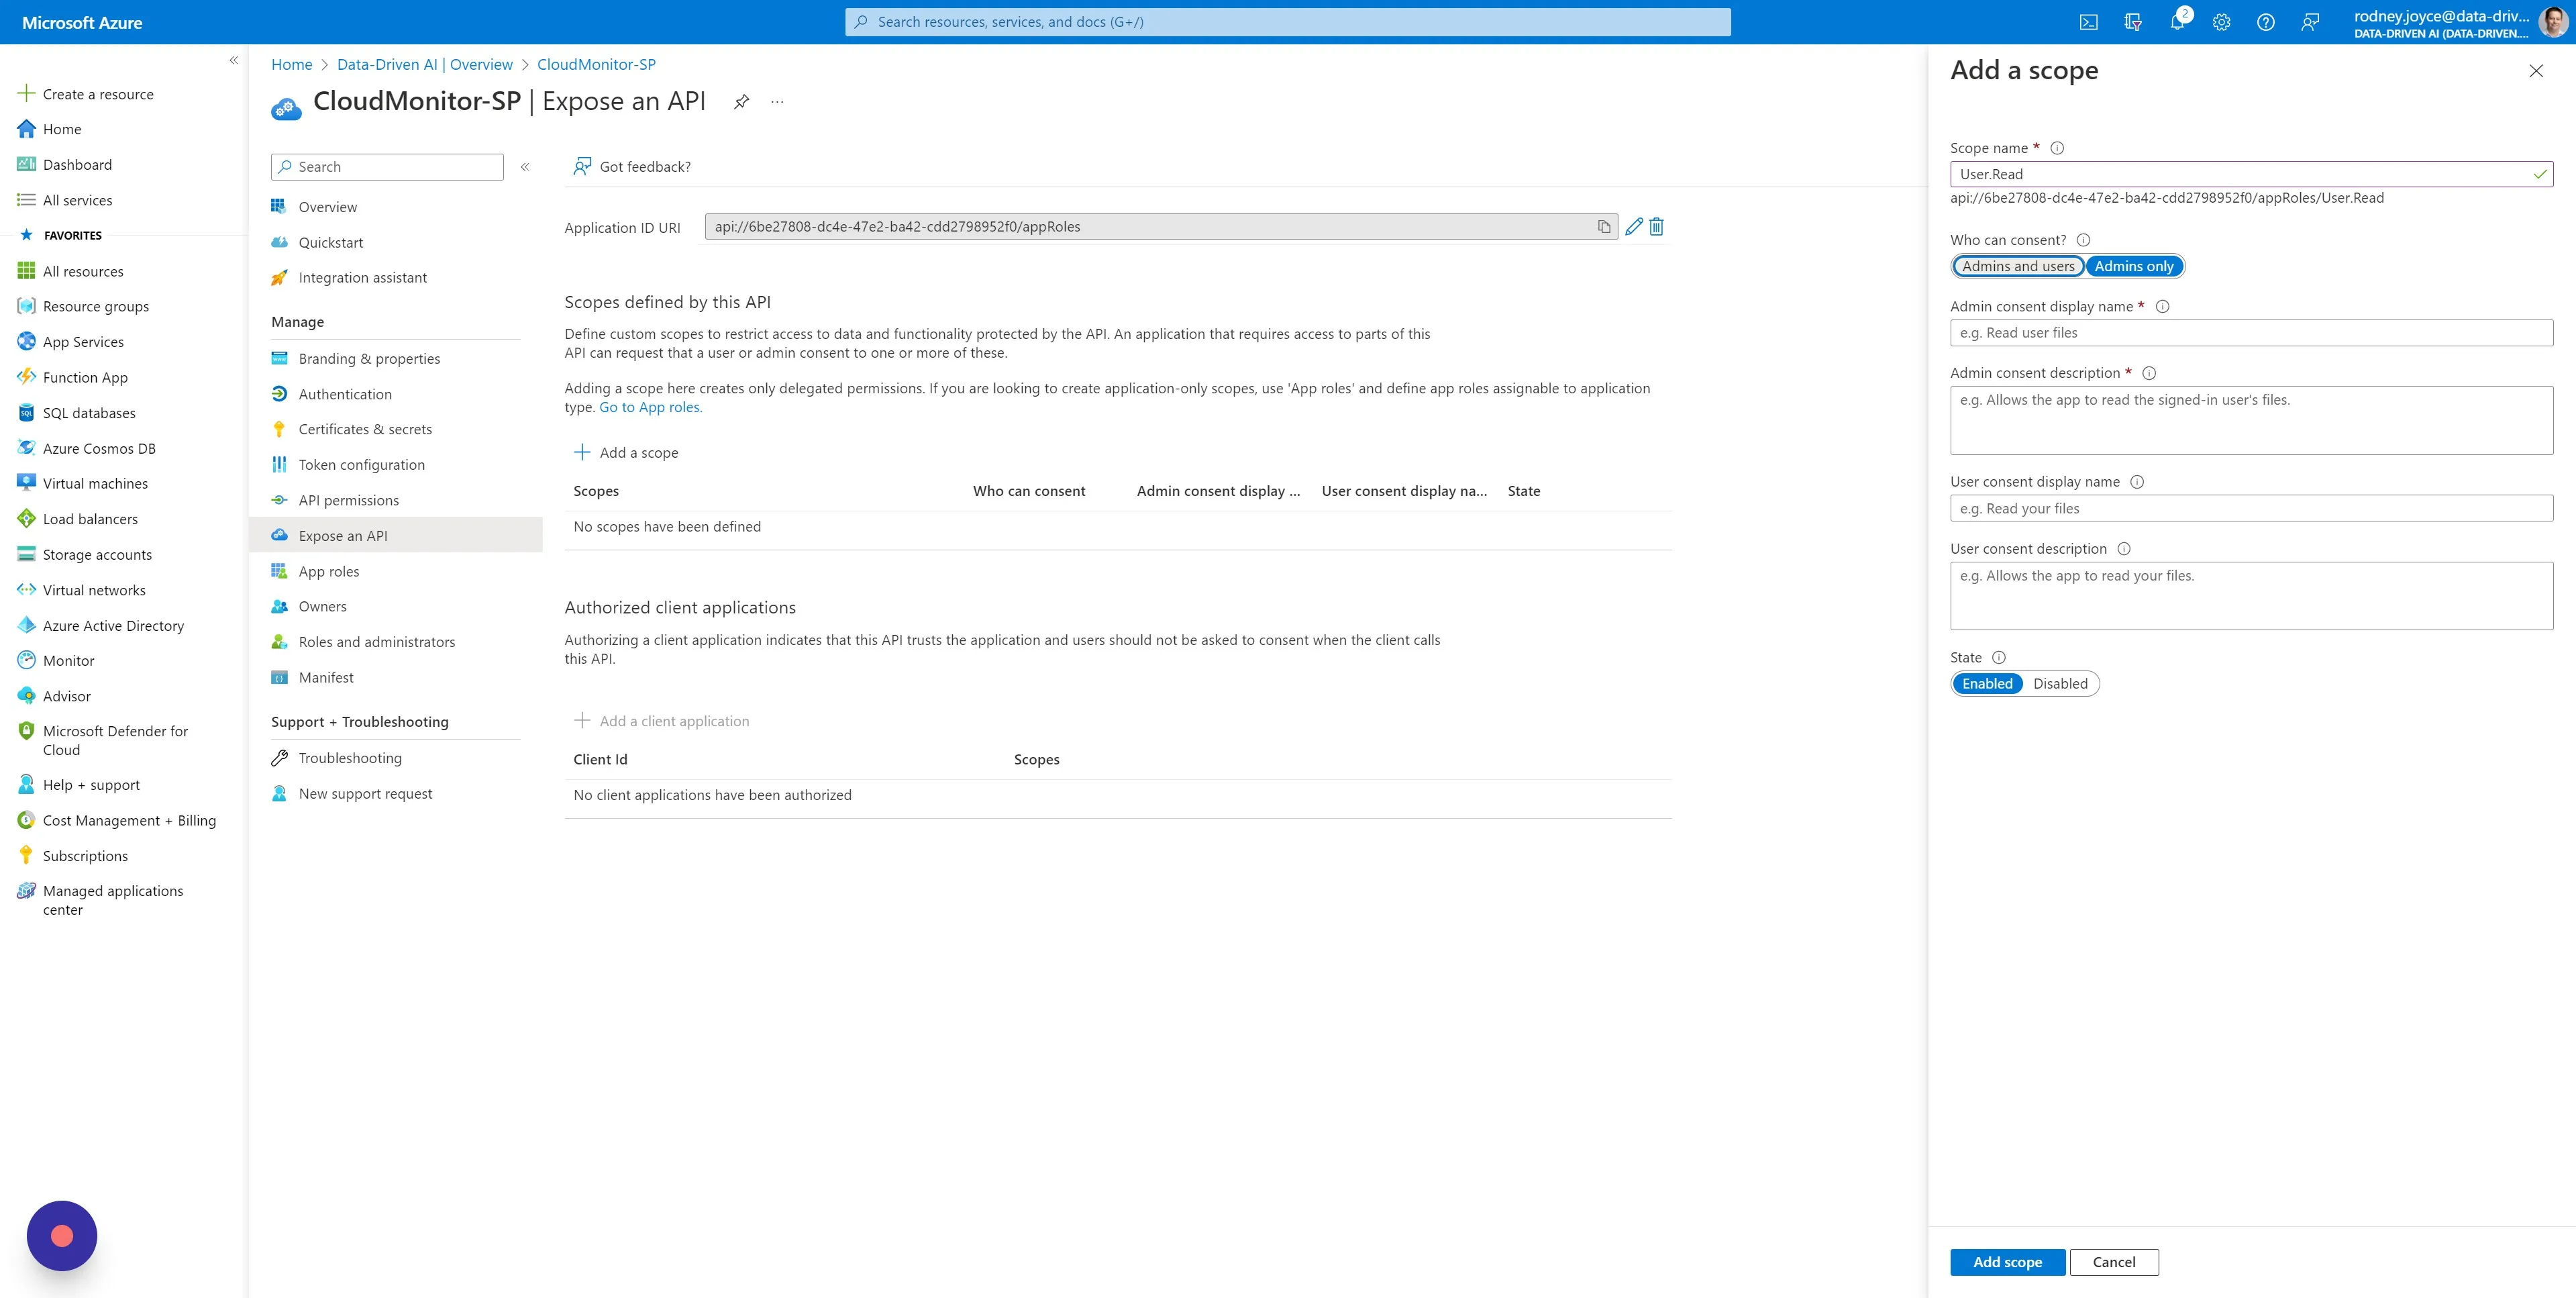
Section titled “Step 8”Enter “User.Read” in the “Scope name” field and select “Admins and users”.
Step 9
Section titled “Step 9”Click the “Admin consent display name” field and enter “UserRoles”. Copy this into the “Admin consent description”, as well as the “User consent display name” and “User consent description” and click on “Add scope” to save.
Step 10
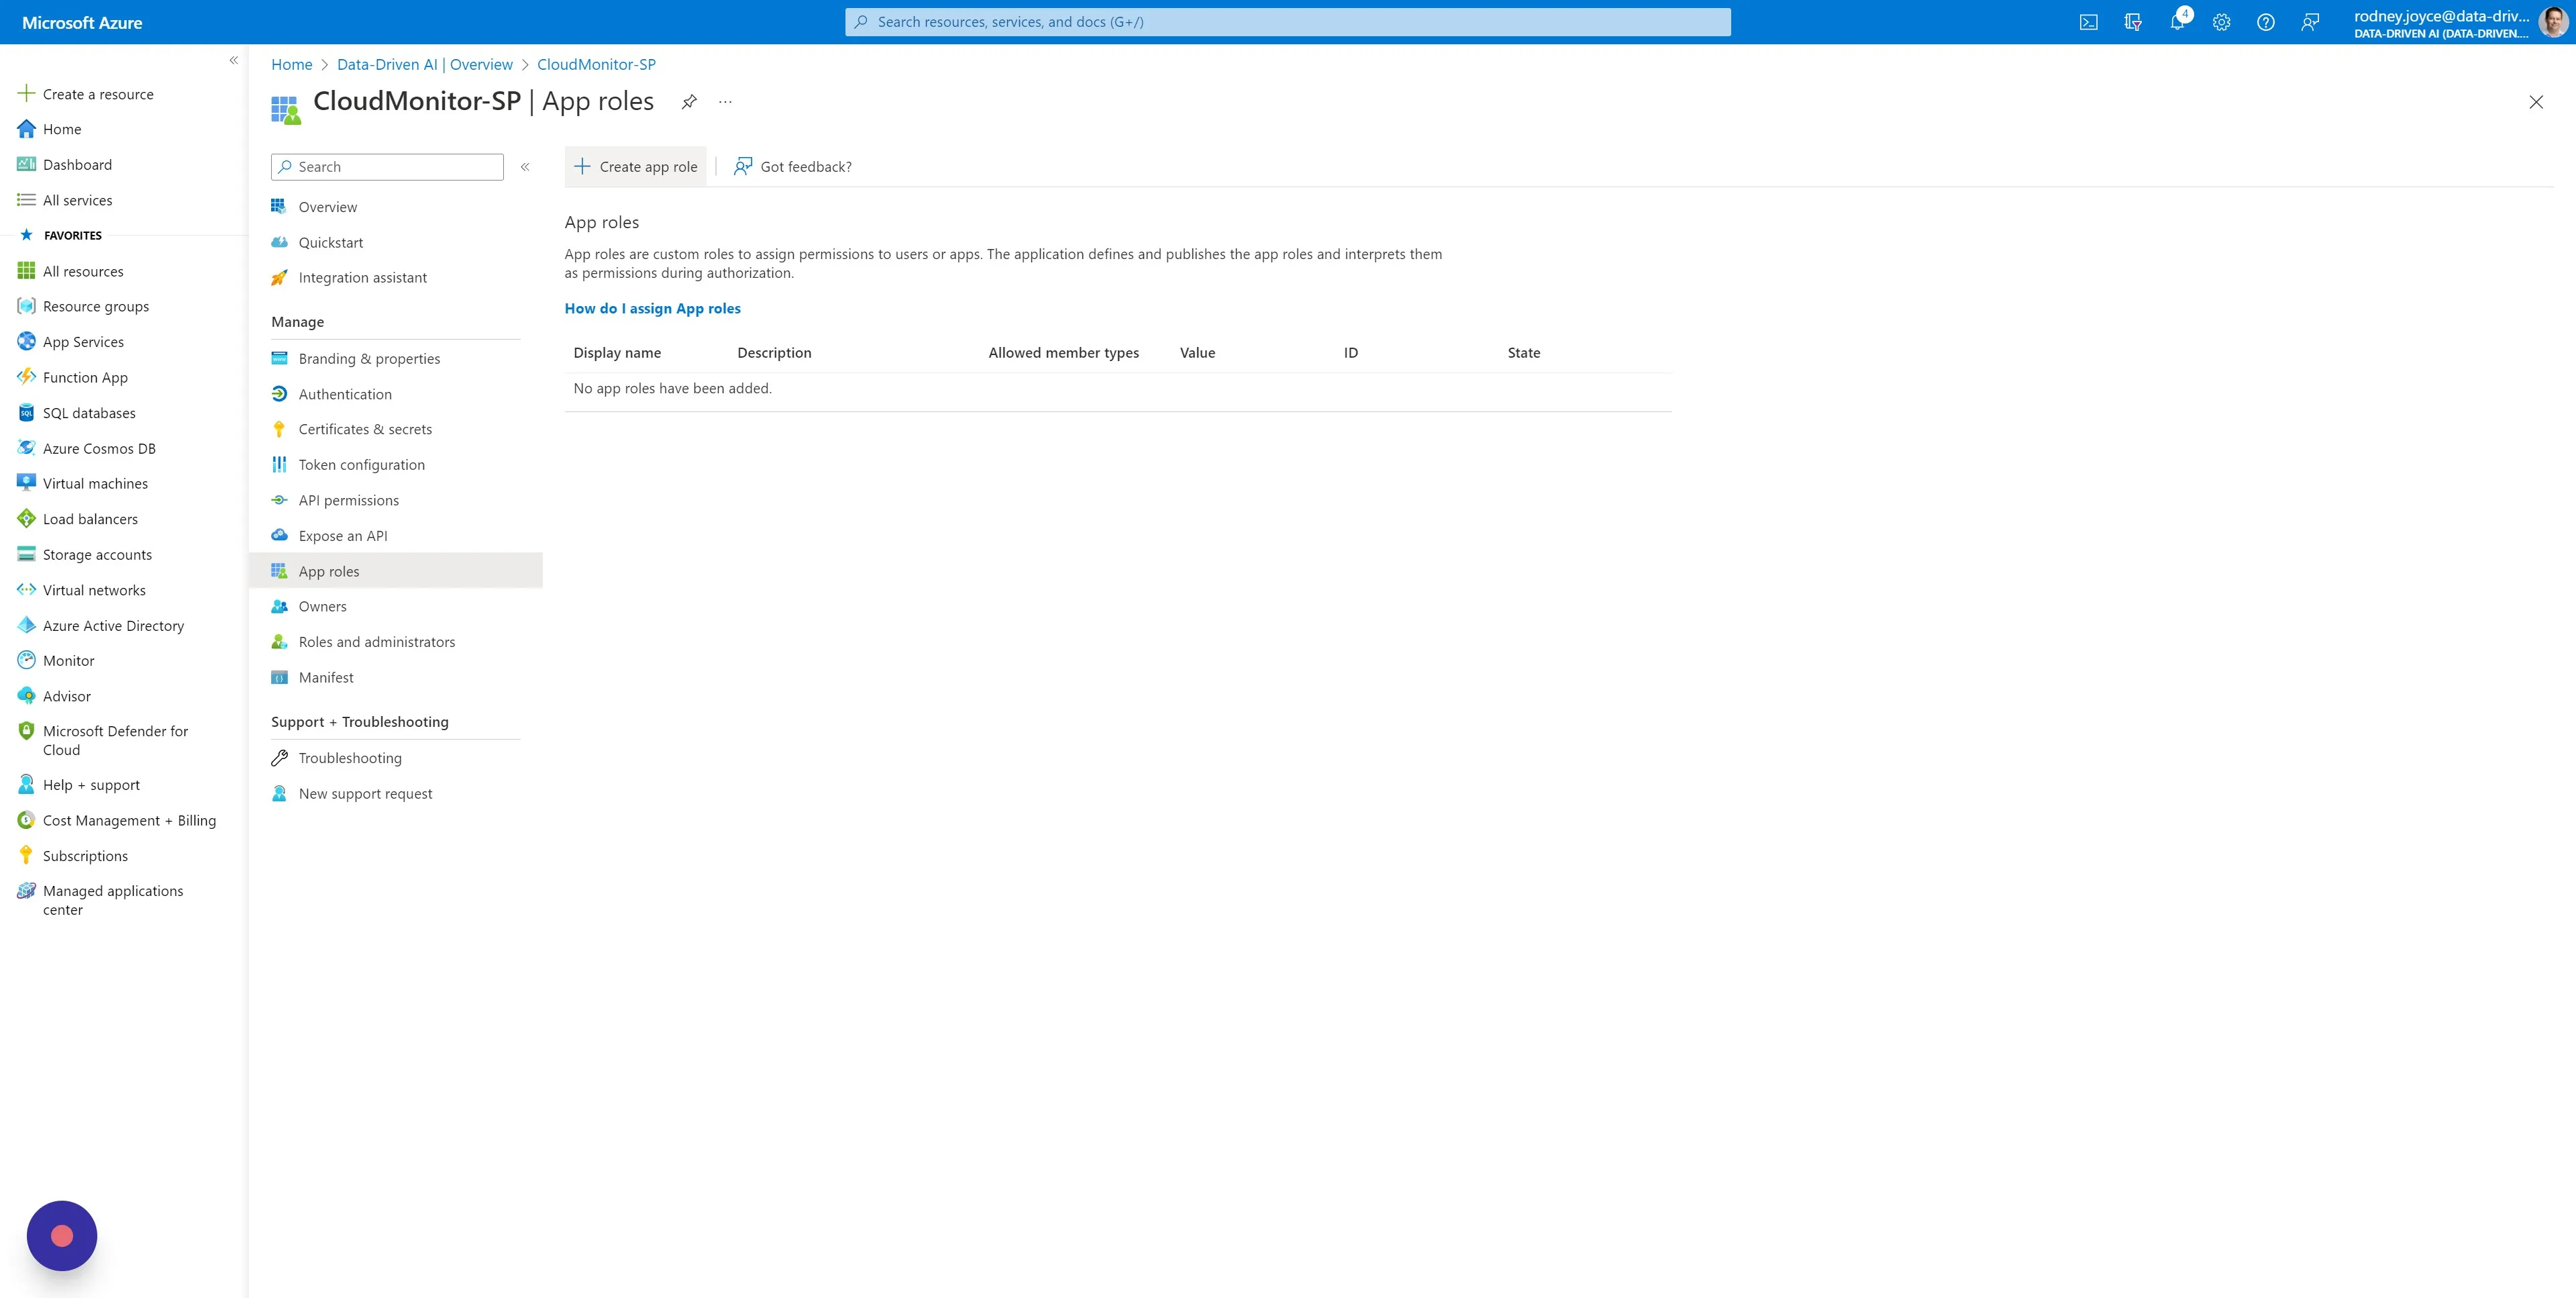
Section titled “Step 10”Select “App roles” in the left menu. and click on “Create app role”.
Step 11
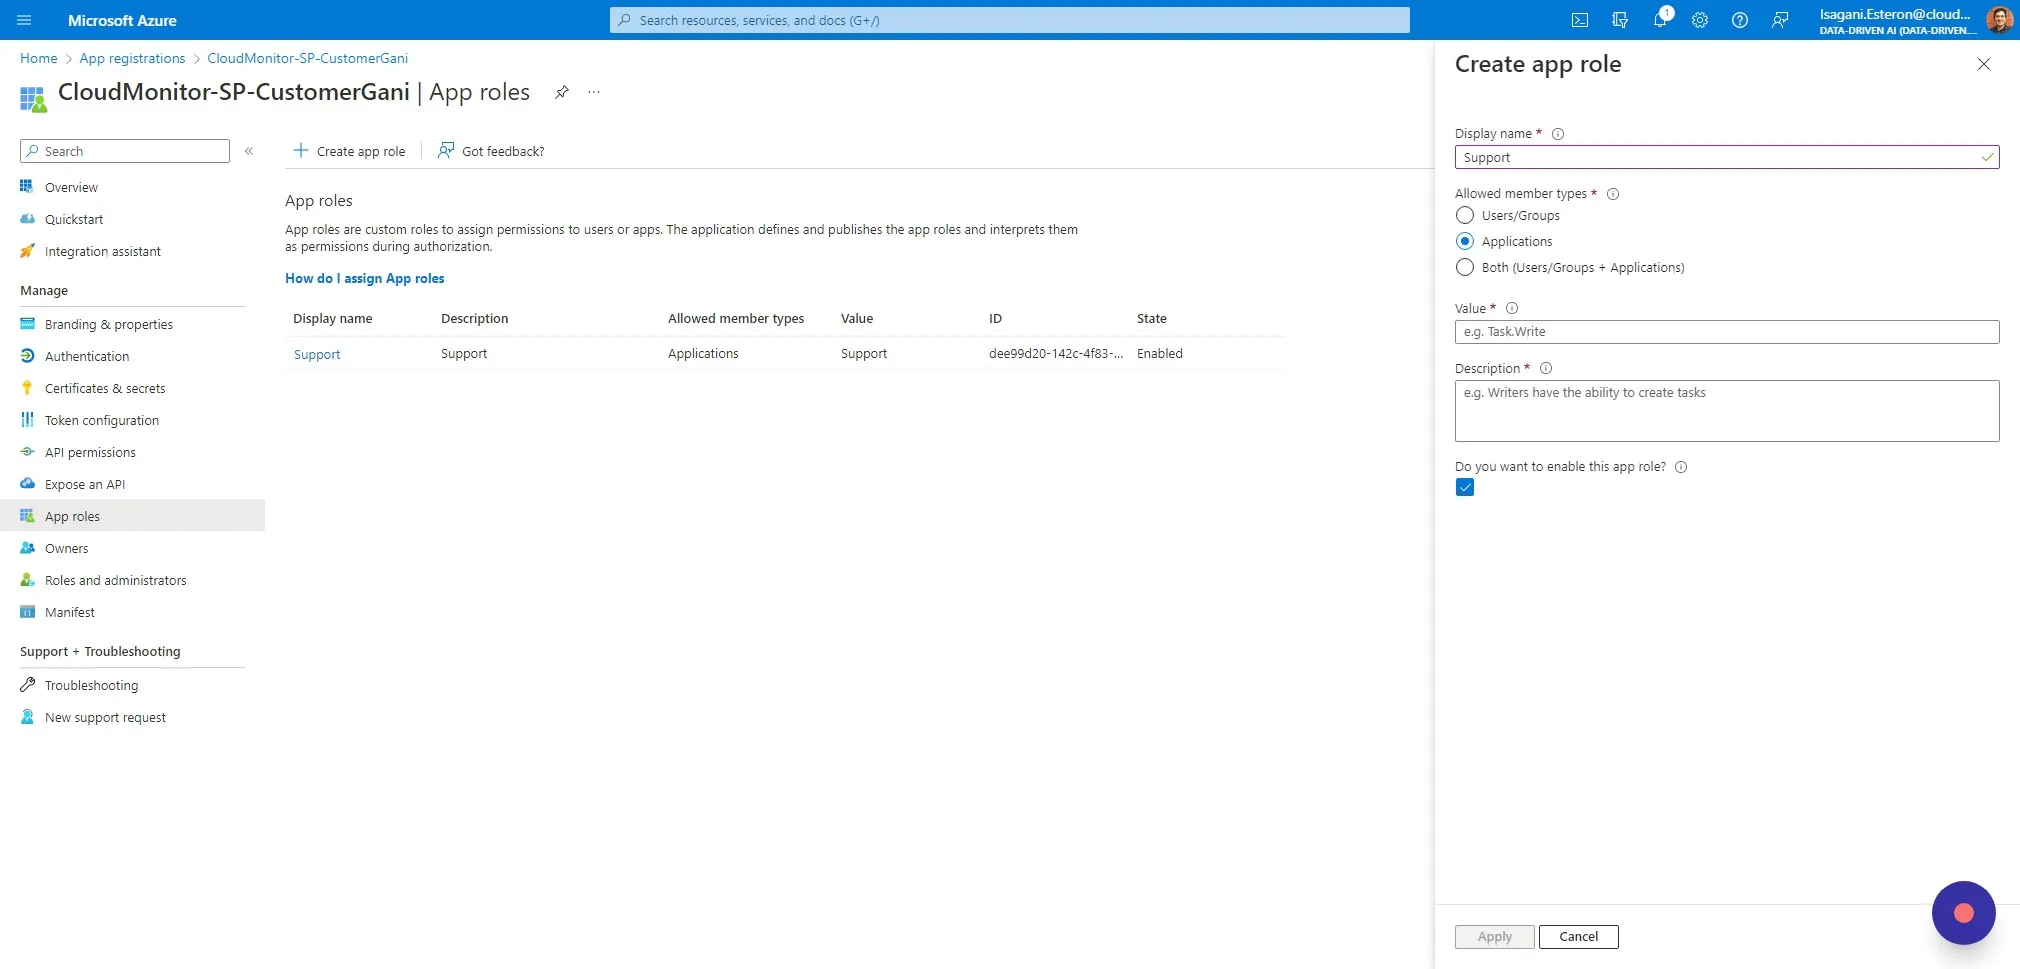
Section titled “Step 11”Enter “Support” as the name and choose “Applications”.
Step 12
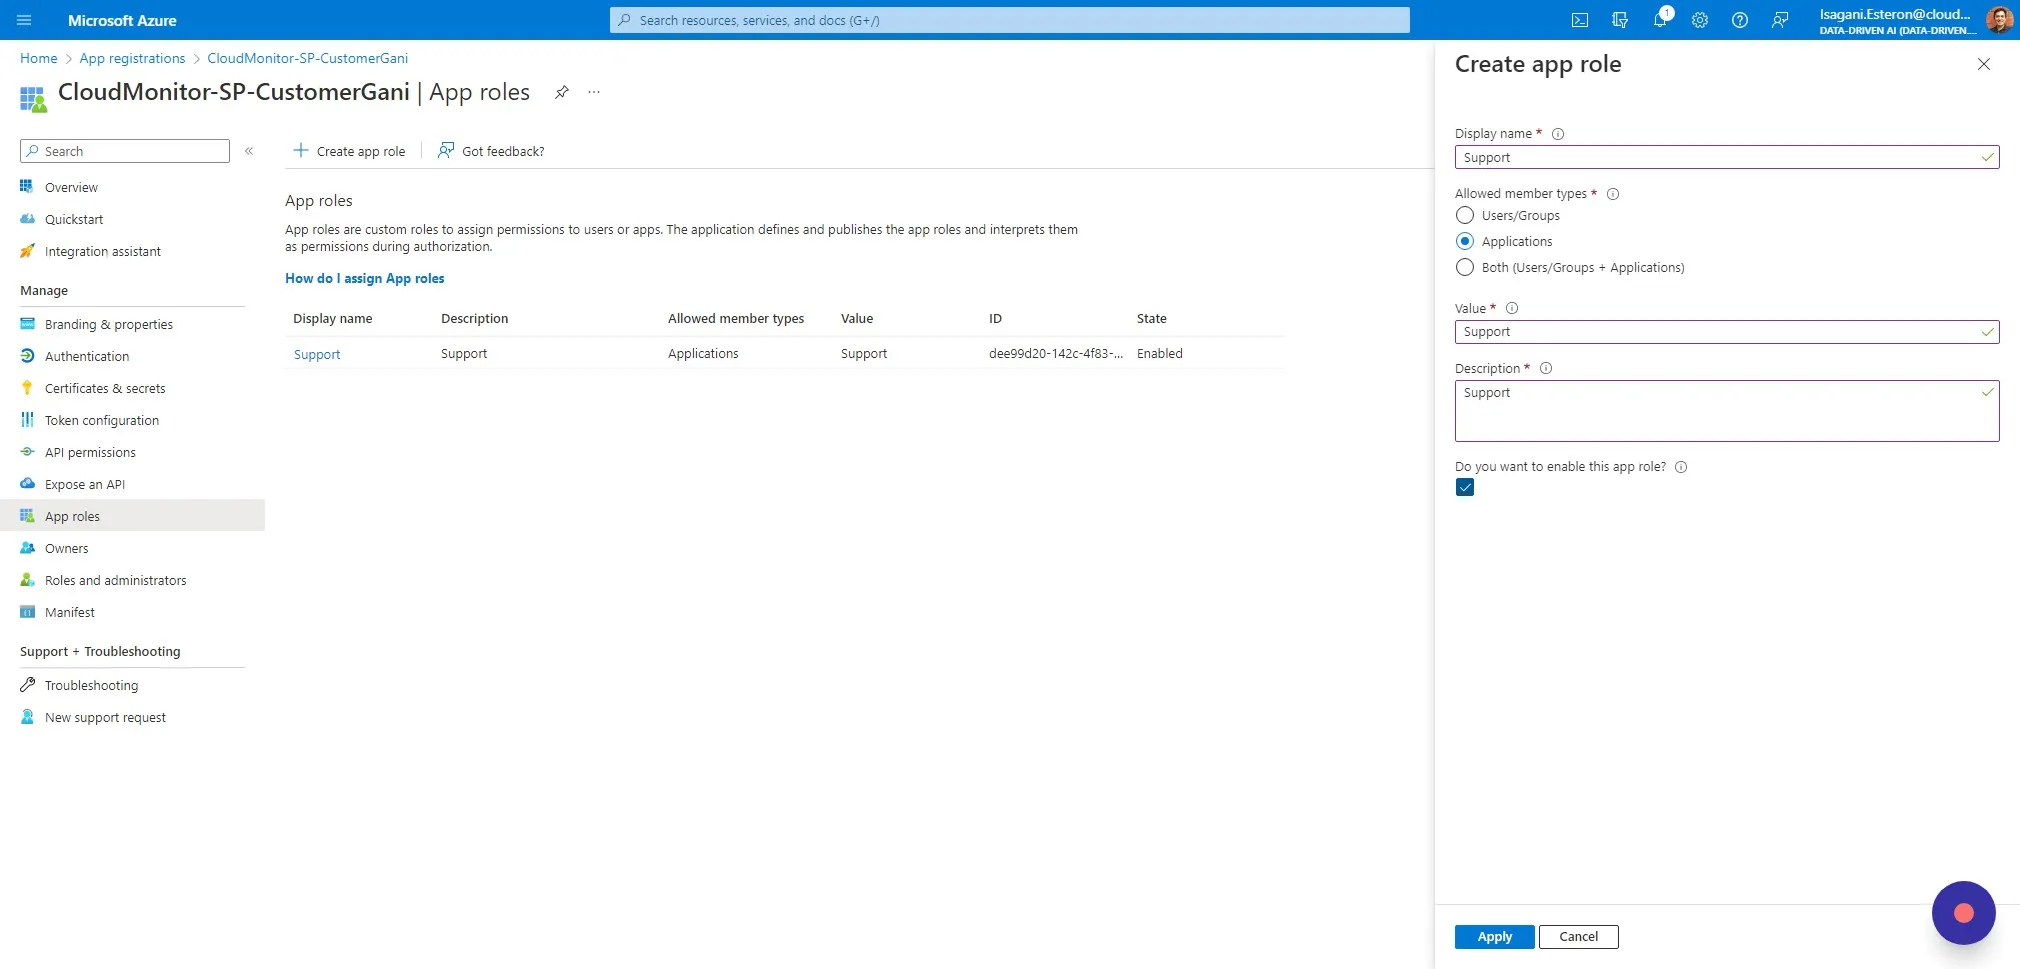
Section titled “Step 12”Click on the Value field and enter “Support”, then copy and paste this into the Description field too. Ensure that the app role is enabled and click on “Apply” to save.
Step 13
Section titled “Step 13”Select “API permissions” in the left menu and click on “Add a permission”.
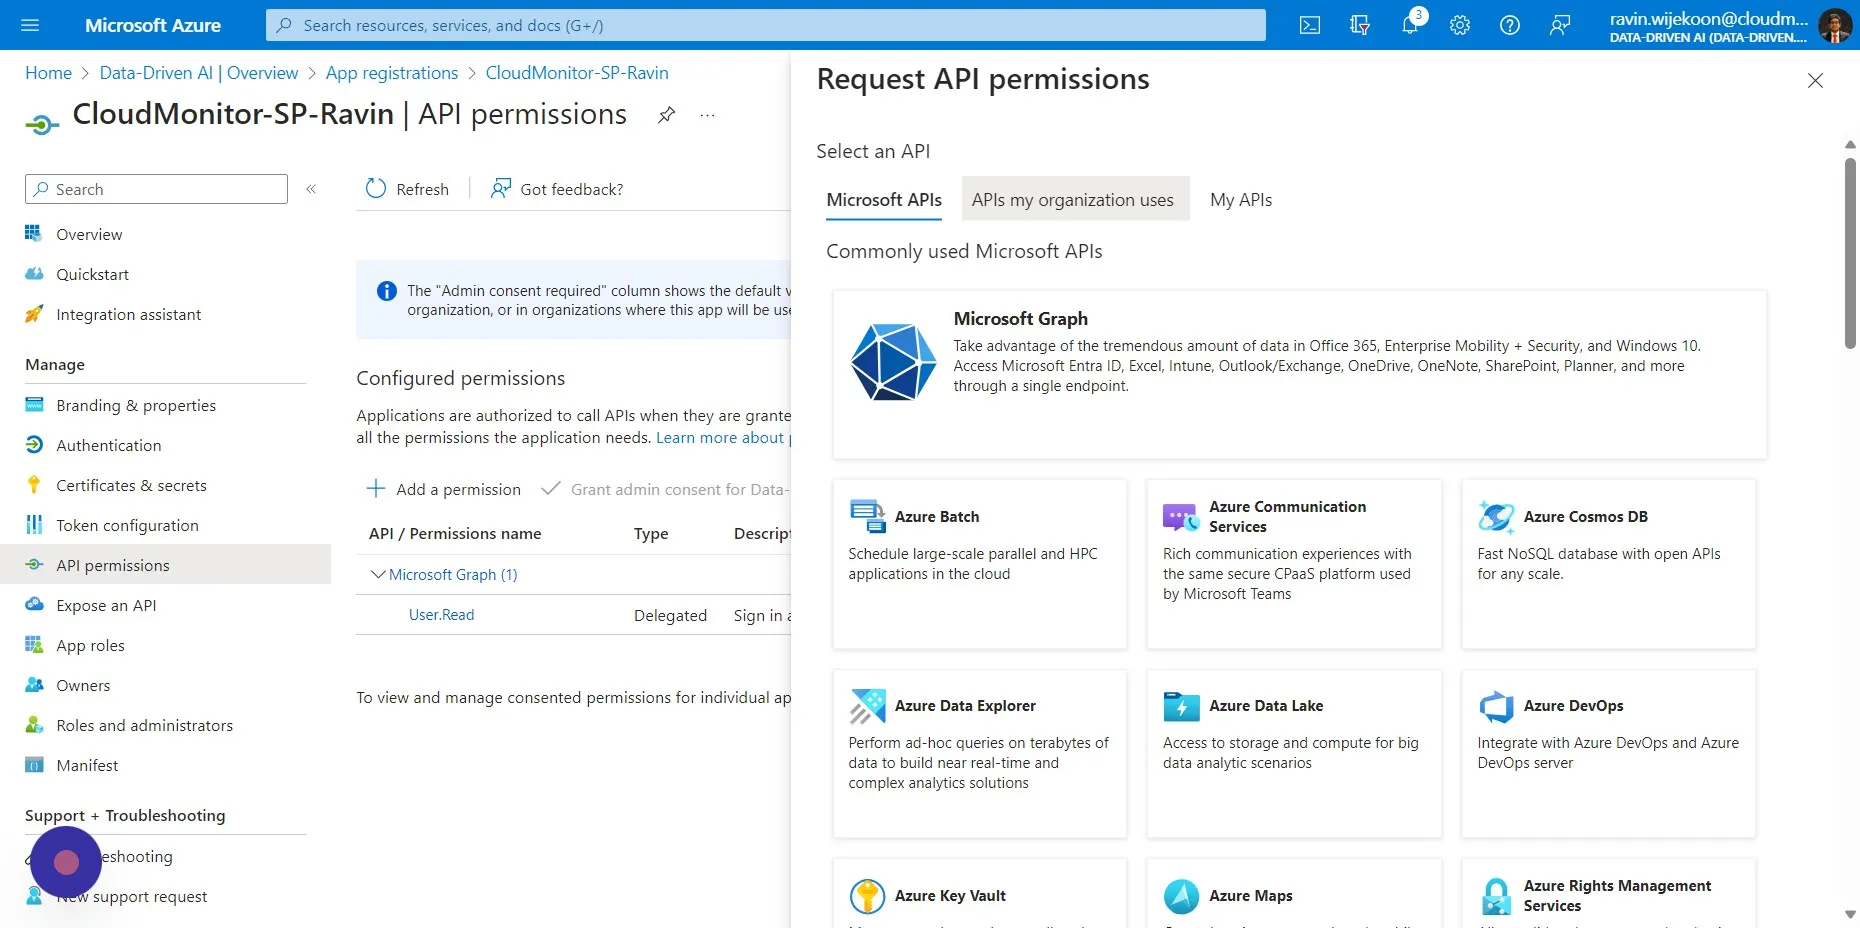
Step 14
Section titled “Step 14”Choose “APIs my organization uses”.
Step 15
Section titled “Step 15”Click the “Start typing an API name or Application ID” field, then search and click on the name of your Service Principal (in our cased it is “CloudMonitor-SP”).

Step 16
Section titled “Step 16”Choose “Application permissions”.
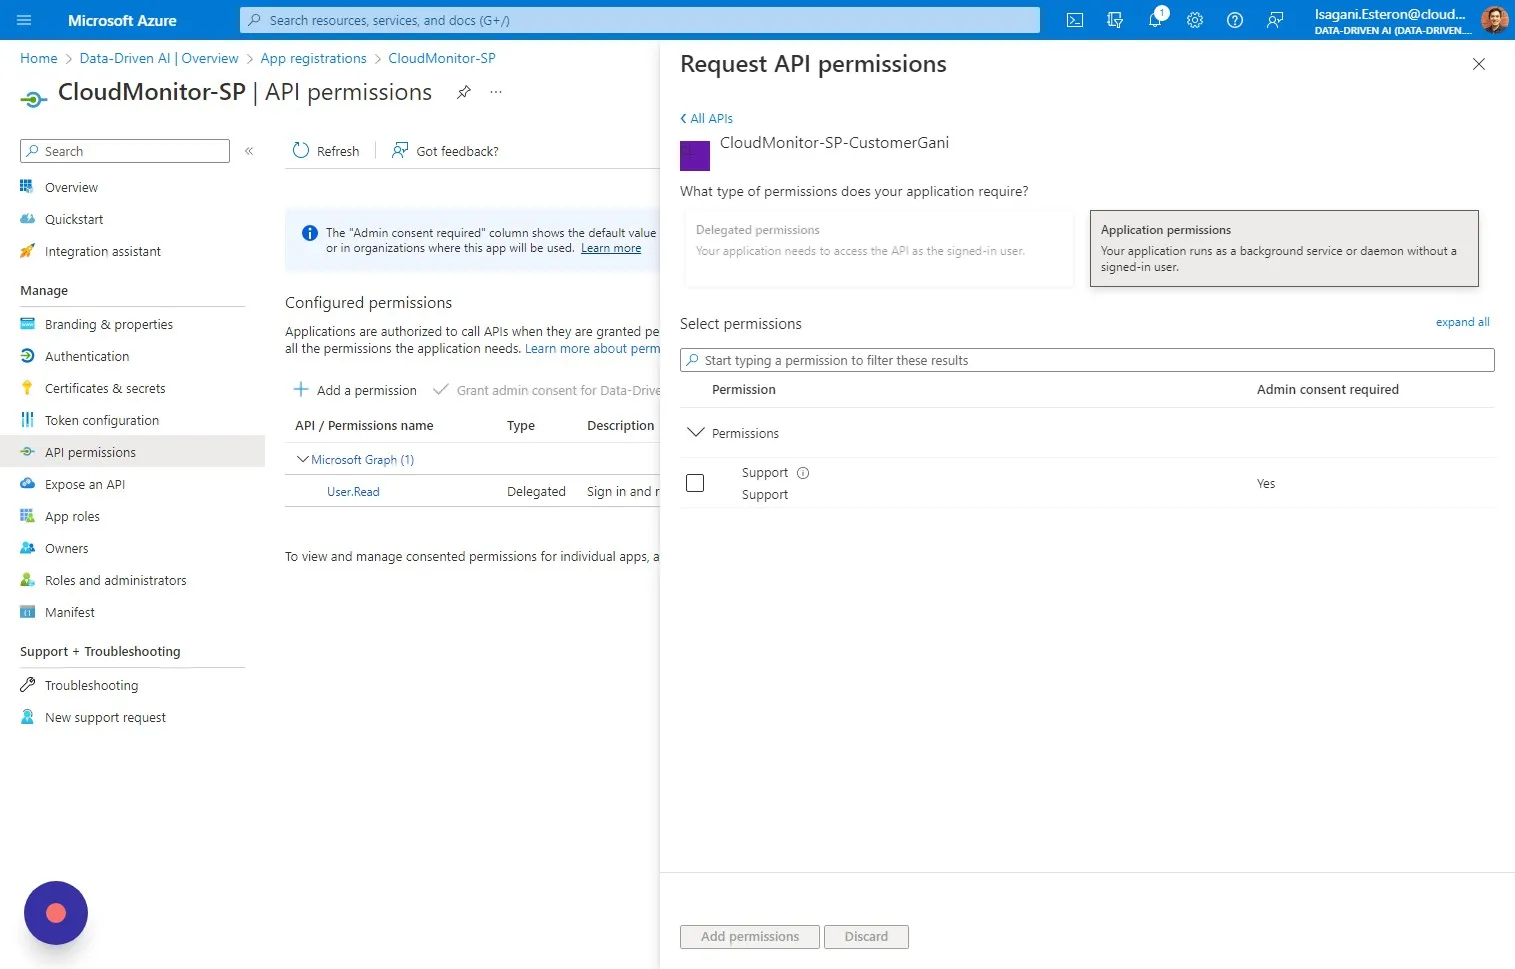
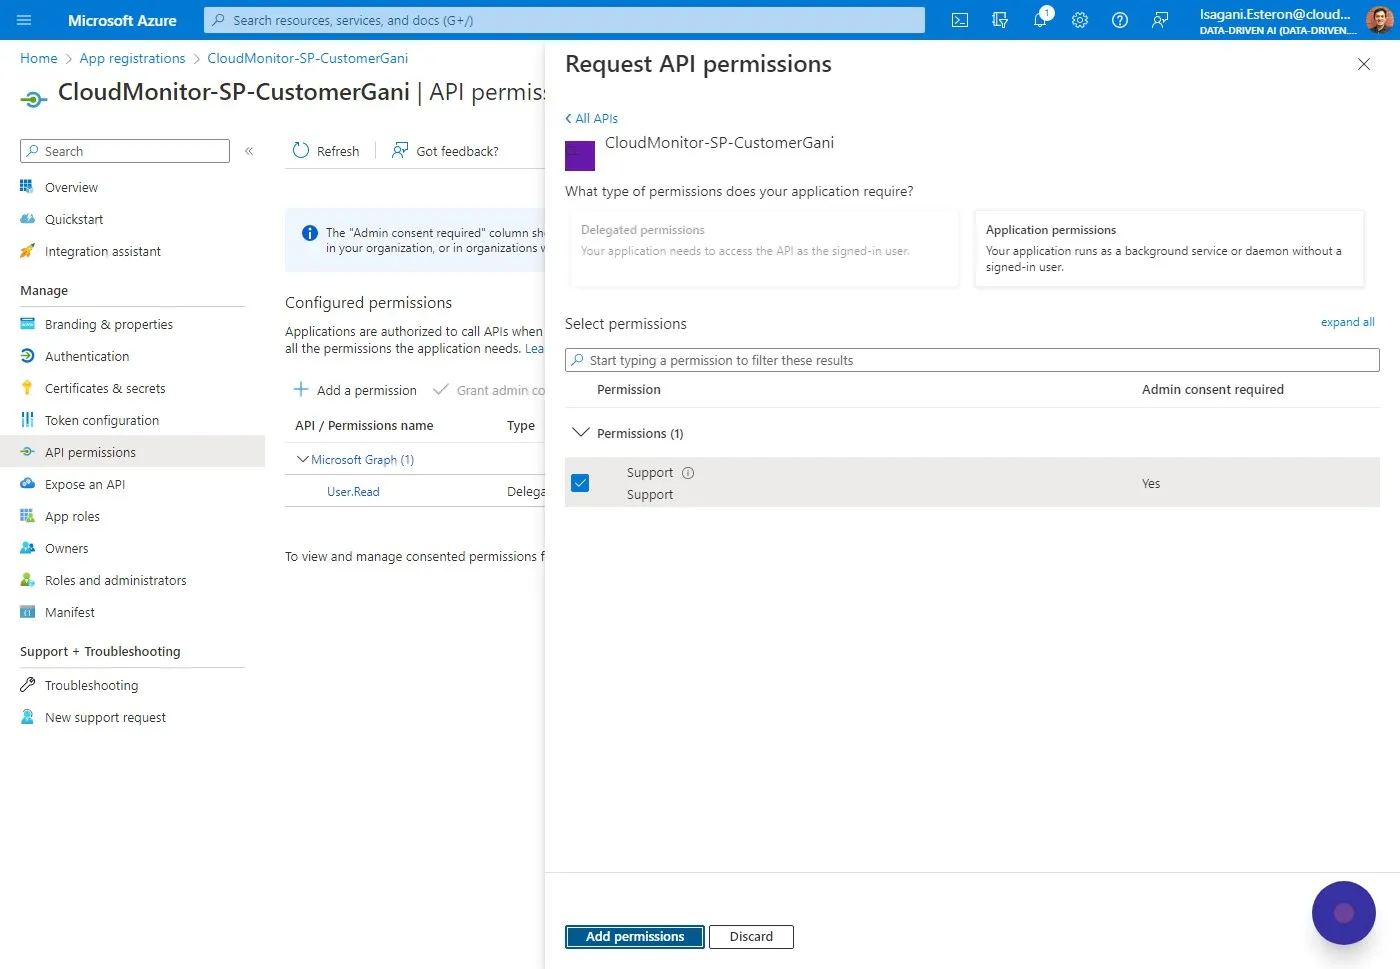
Step 17
Section titled “Step 17”and check the “Support” permission and Click “Add permissions”
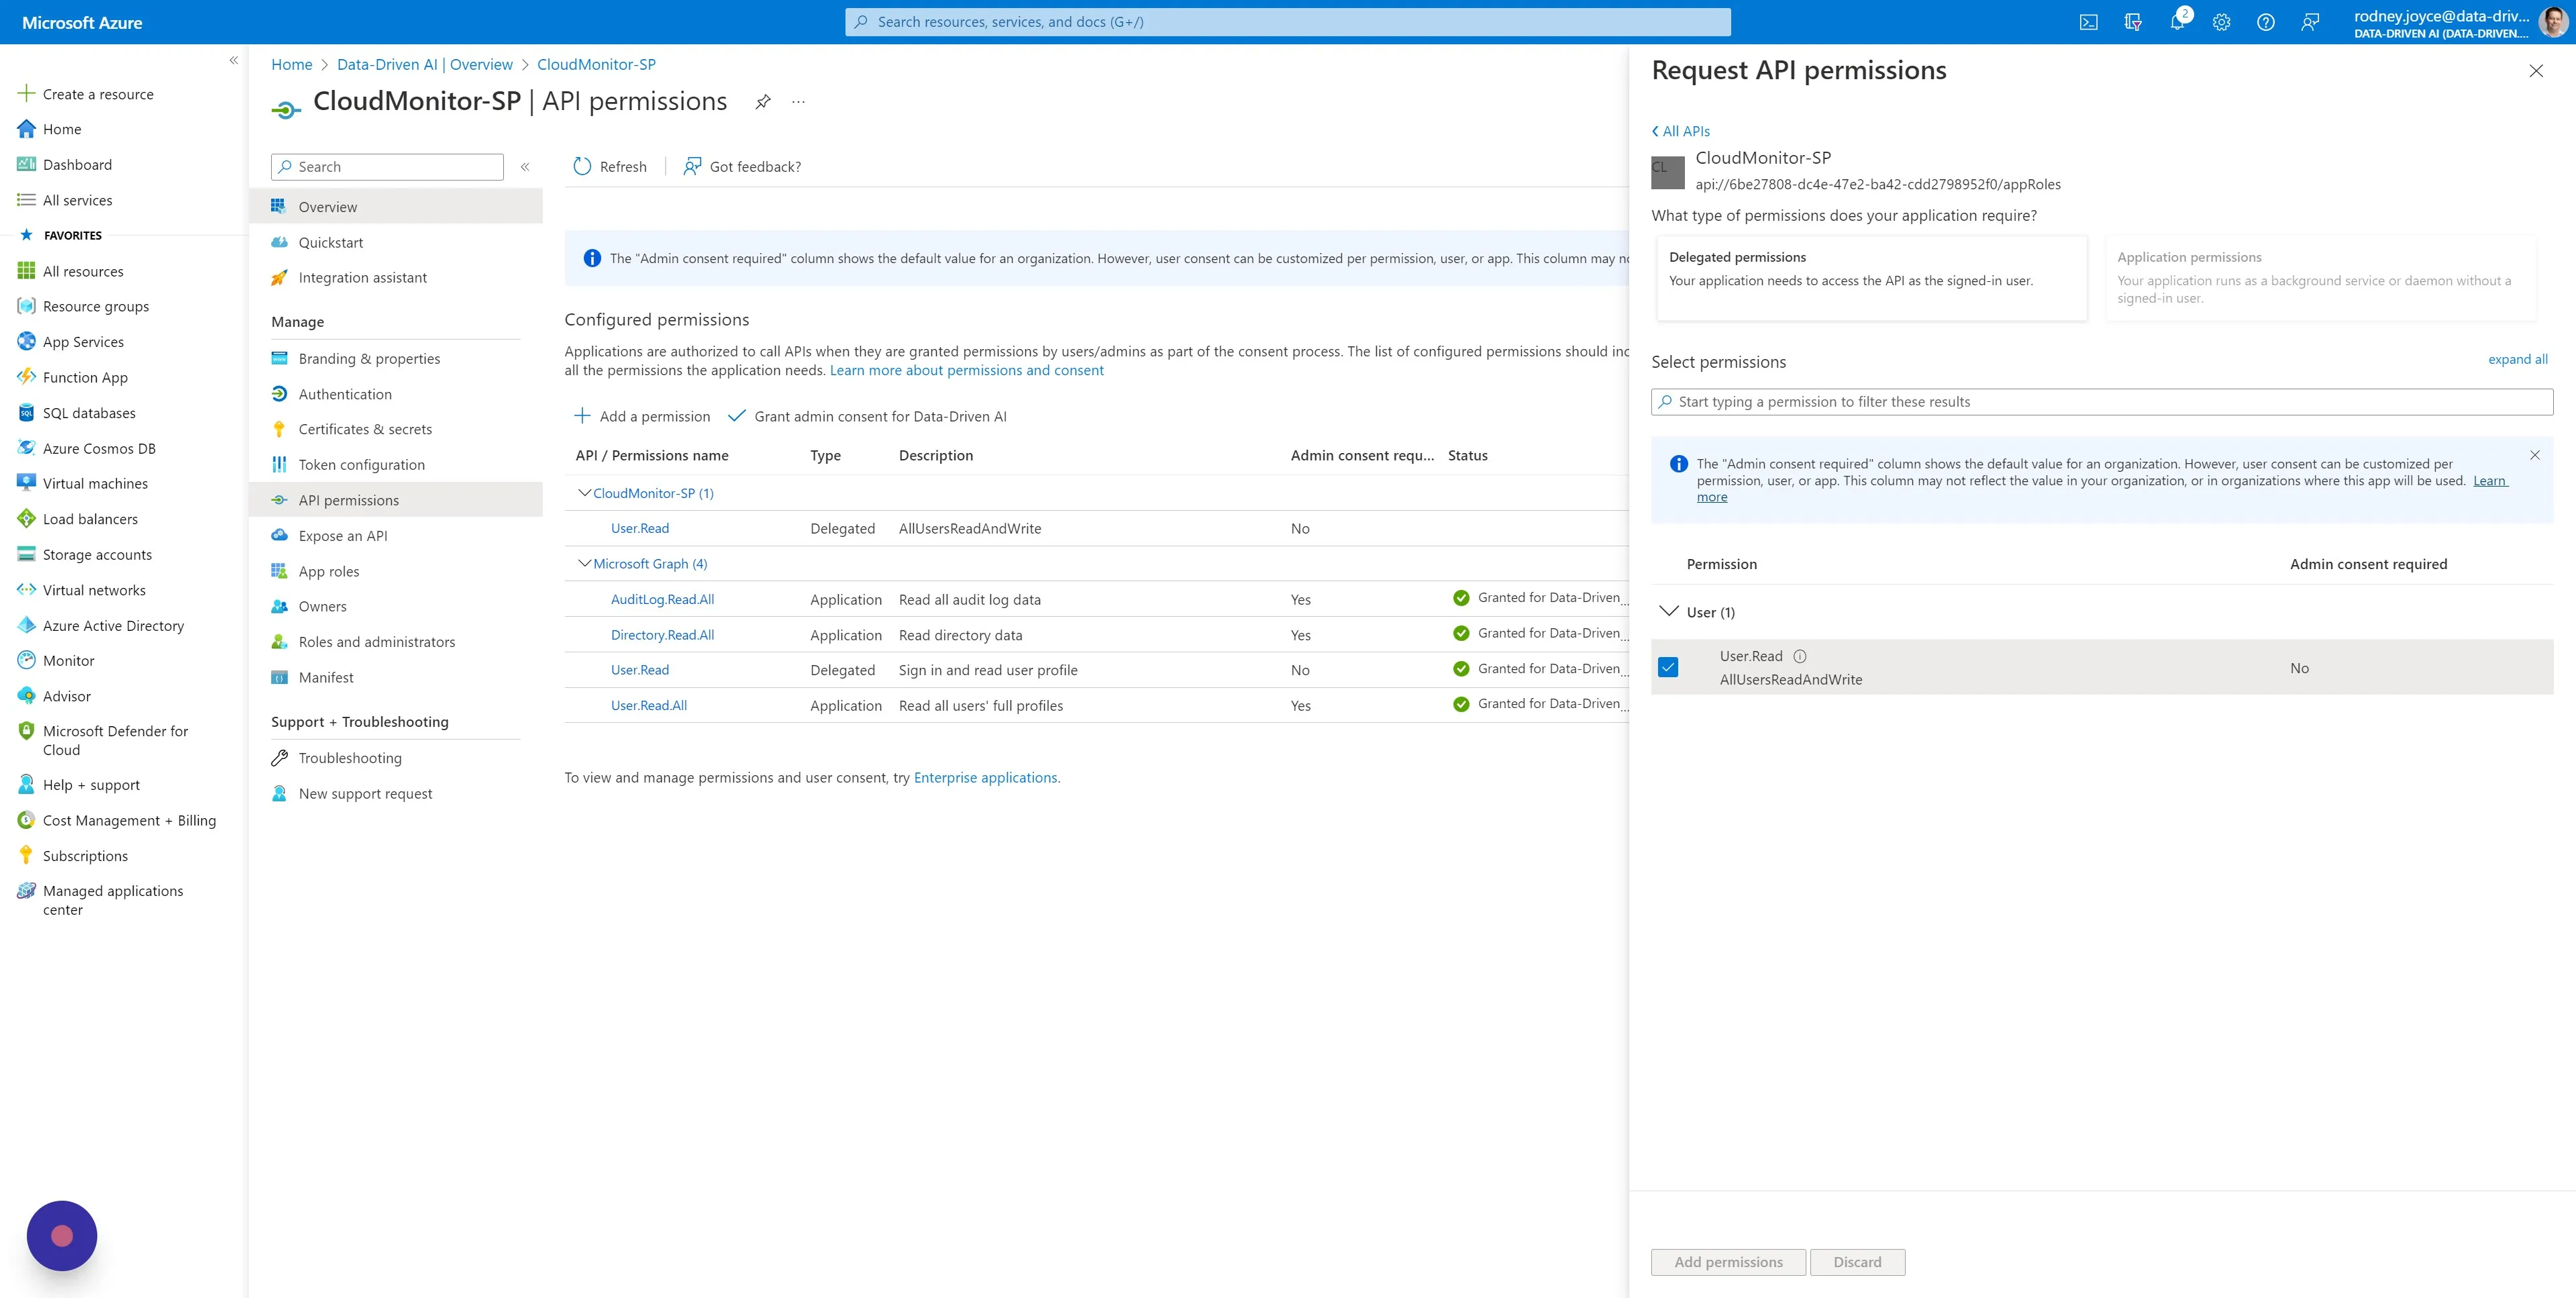
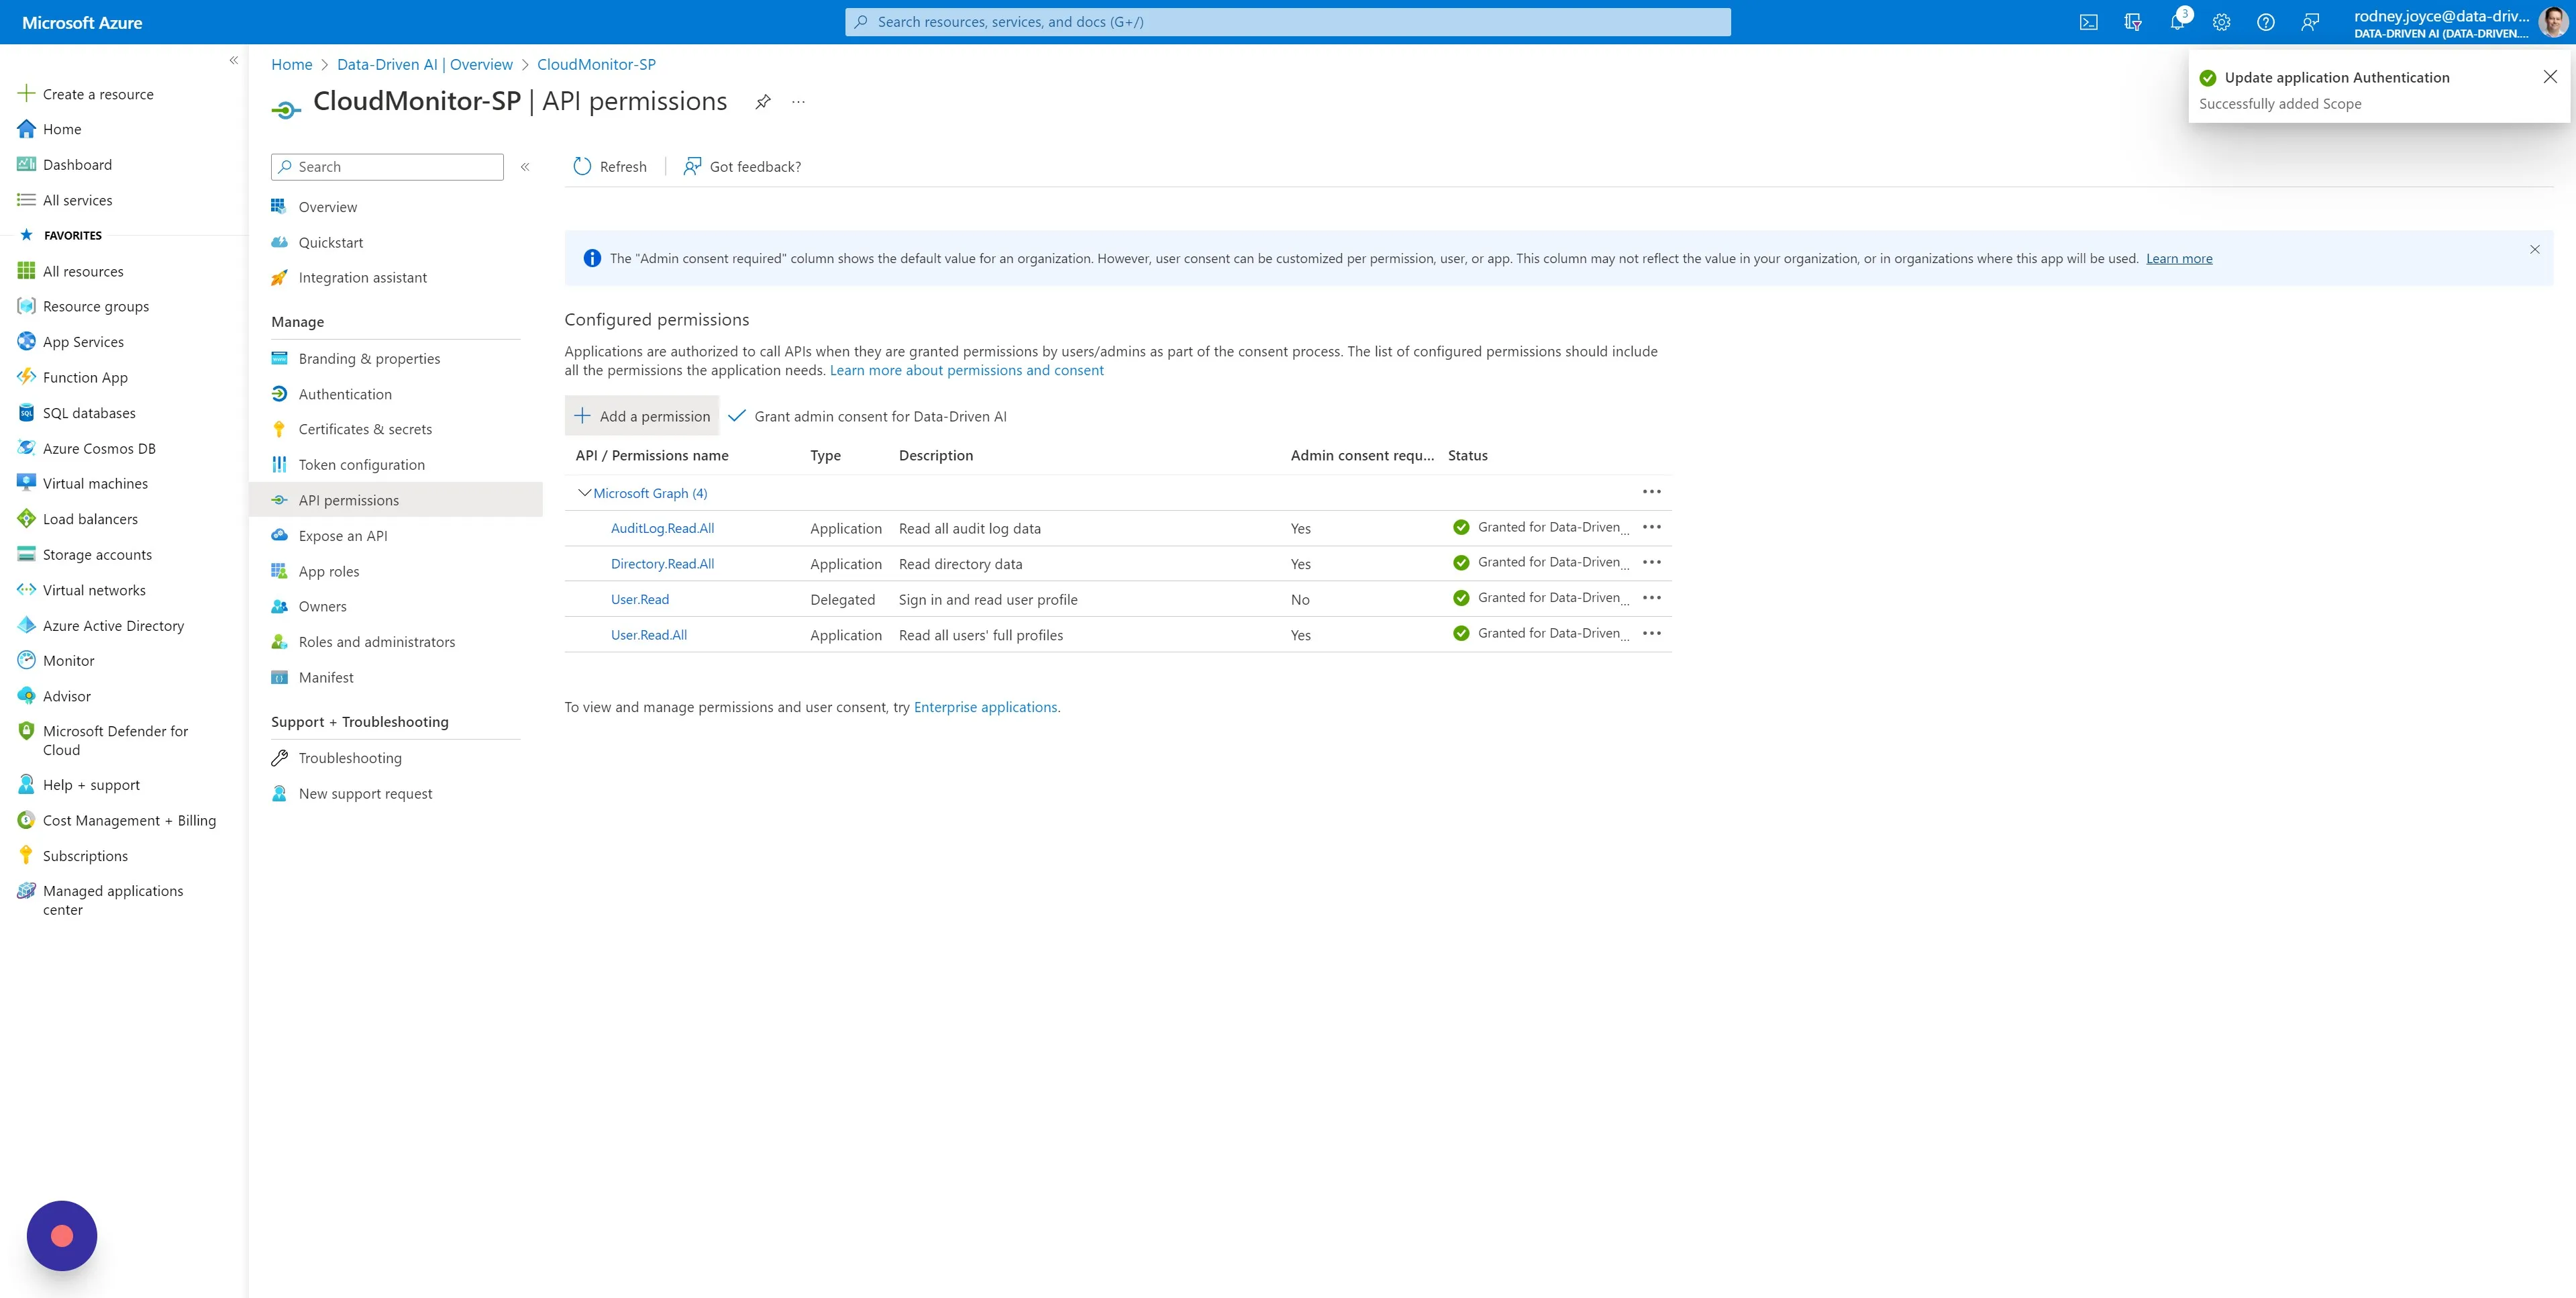
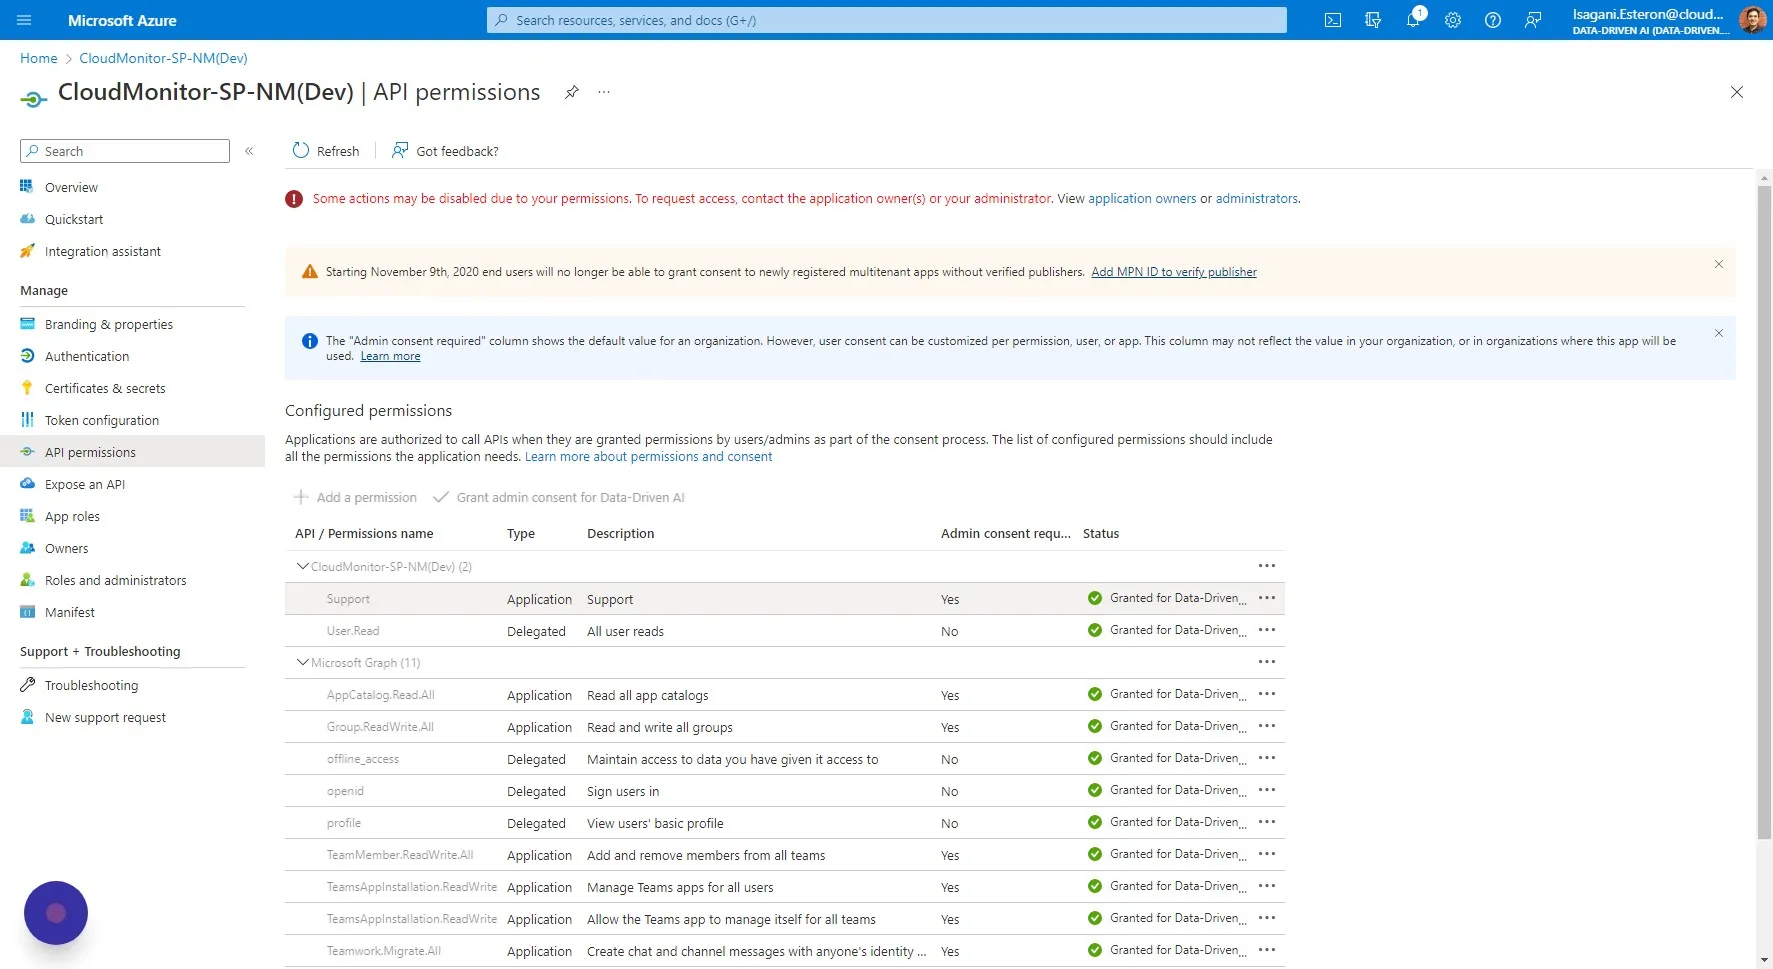
Step 18
Section titled “Step 18”After doing the steps in adding the support application permission and has been granted by your administrator, it should look like this.
Step 19
Section titled “Step 19”You have now configured the Admin App for login.
Navigate to your Admin App Url and test that you are able to log in with the Admin Account you specified during the CloudMonitor engine install. If you have an issues, raise a helpdesk ticket and our support team will get back to you.