How to enable Cost Groups
Step 1
Section titled “Step 1”Open the Cloud Monitor Admin App and log in as an App Admin
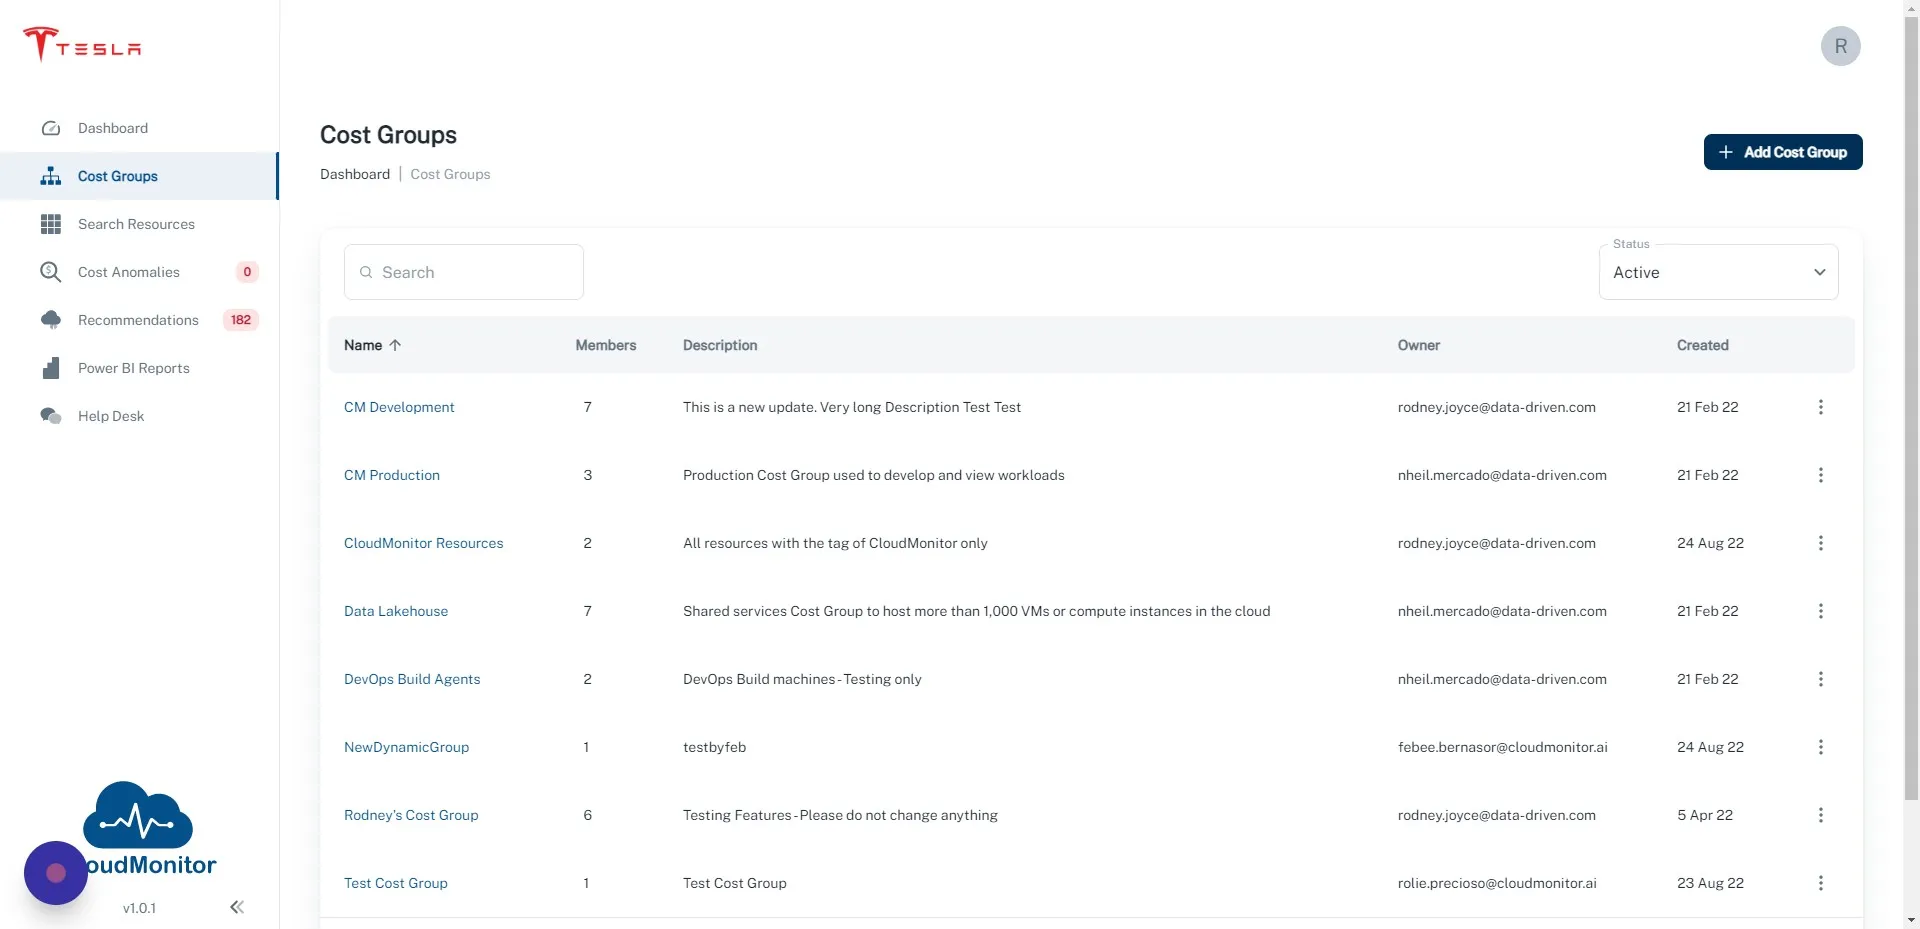
Step 2
Section titled “Step 2”Click “Cost Groups”
Step 3
Section titled “Step 3”Click “Add Cost Group”
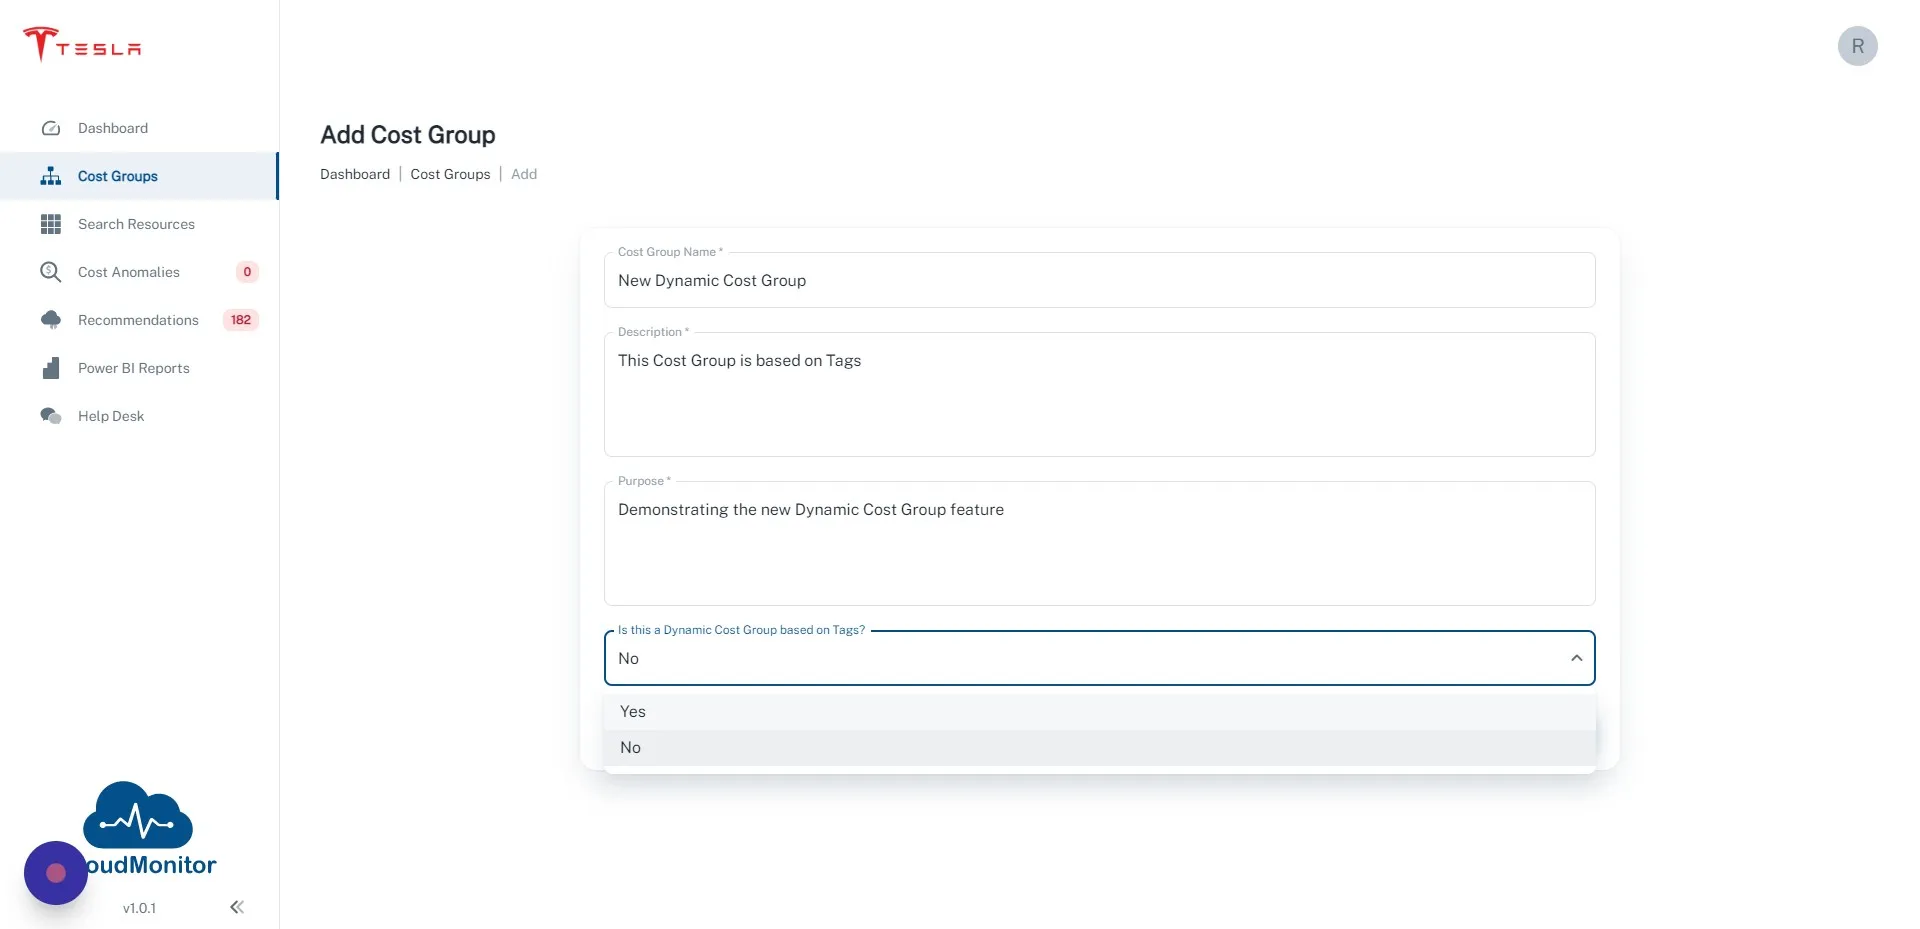
Step 4
Section titled “Step 4”Enter the details for your new Cost Group
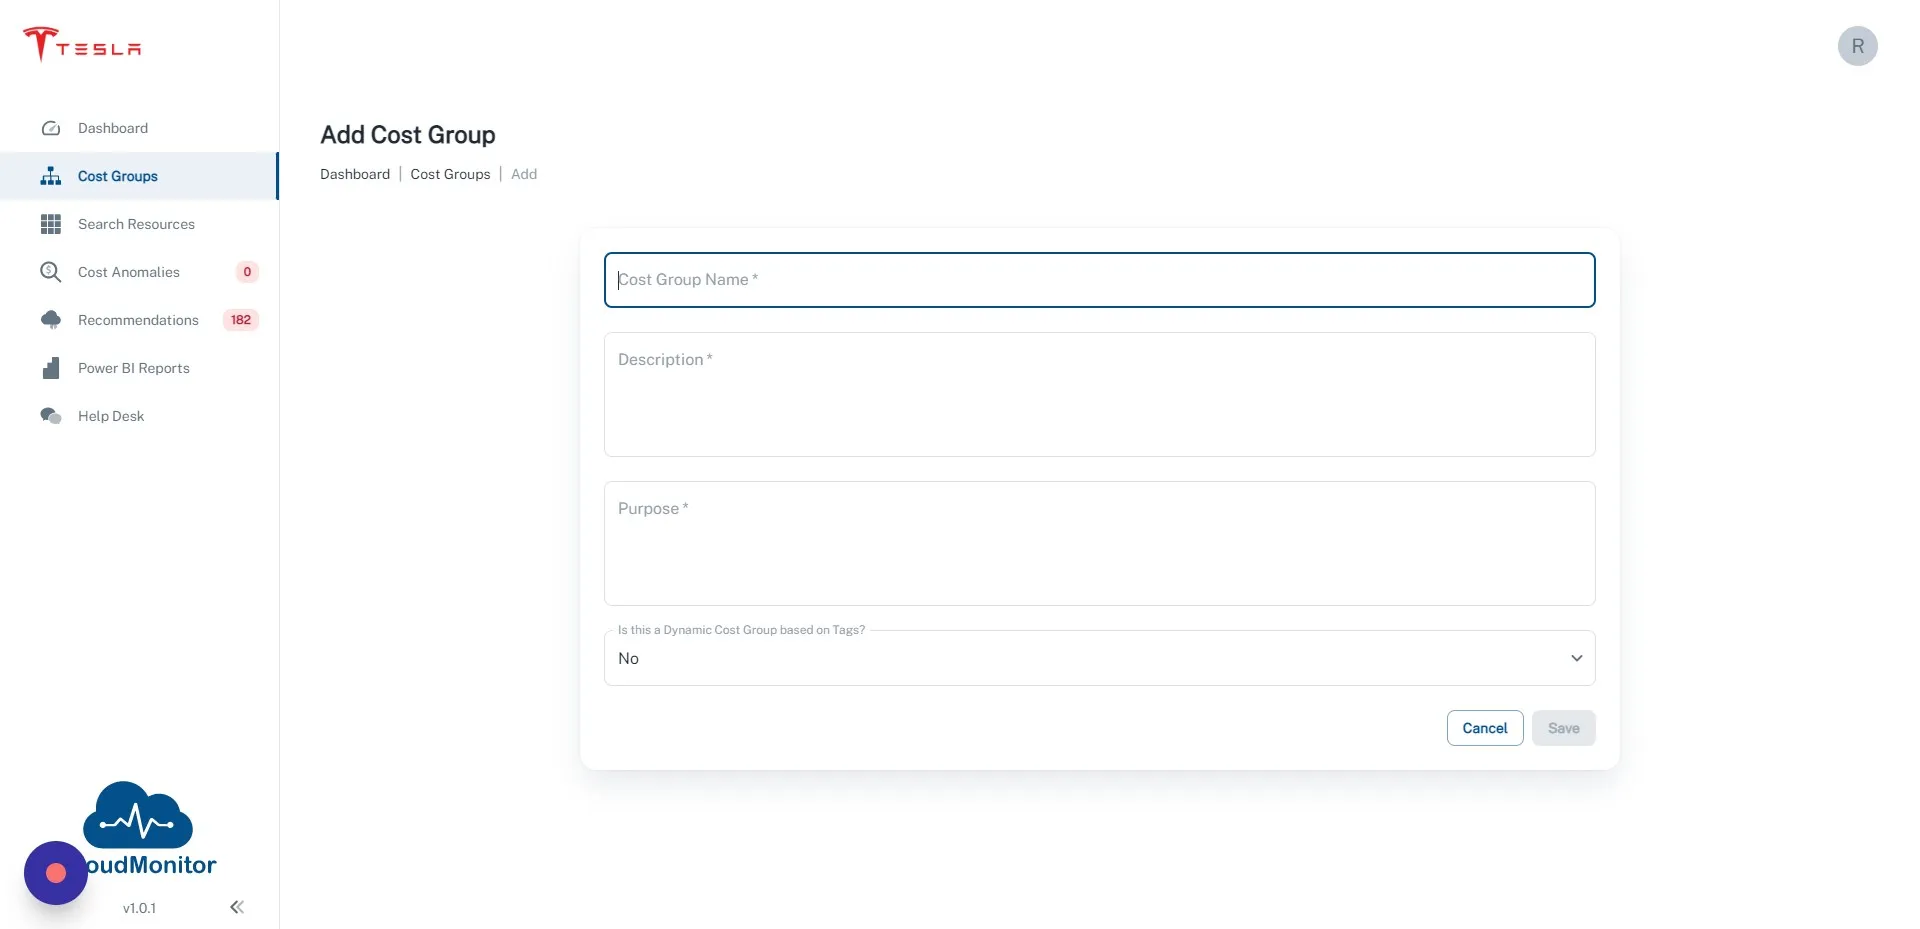
Step 5
Section titled “Step 5”Change “Is this a Dynamic Cost Group based on Tags” to Yes
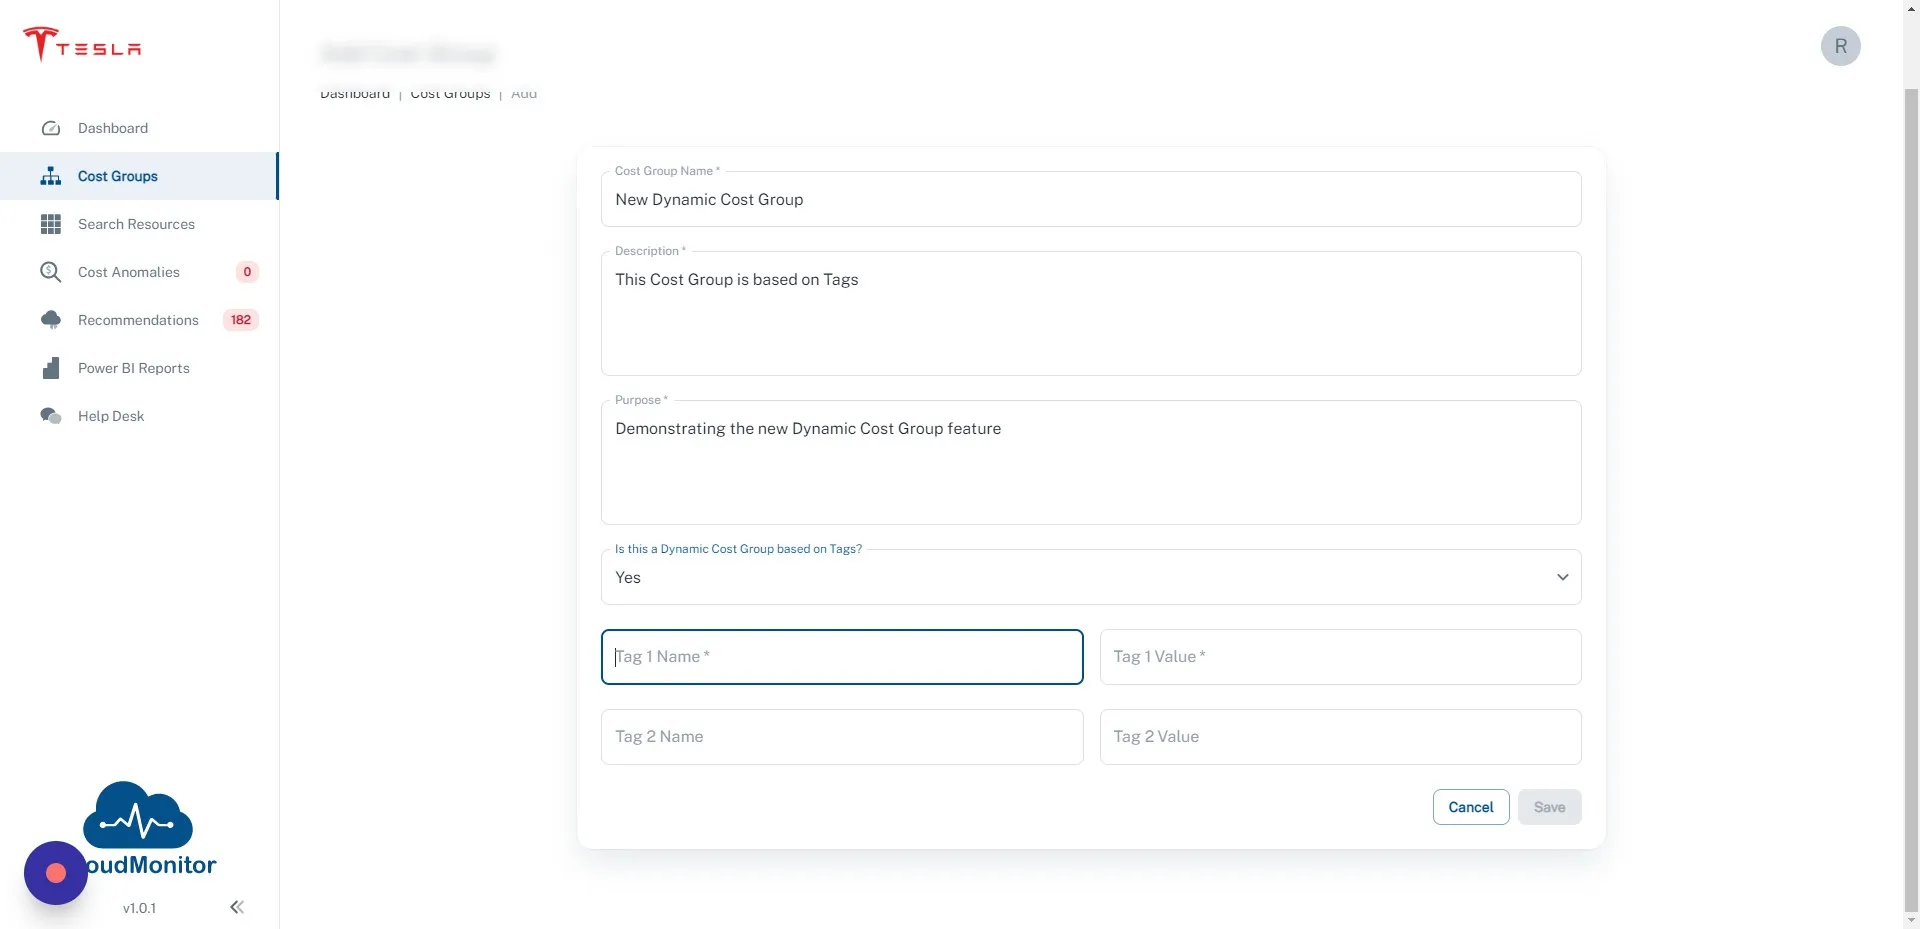
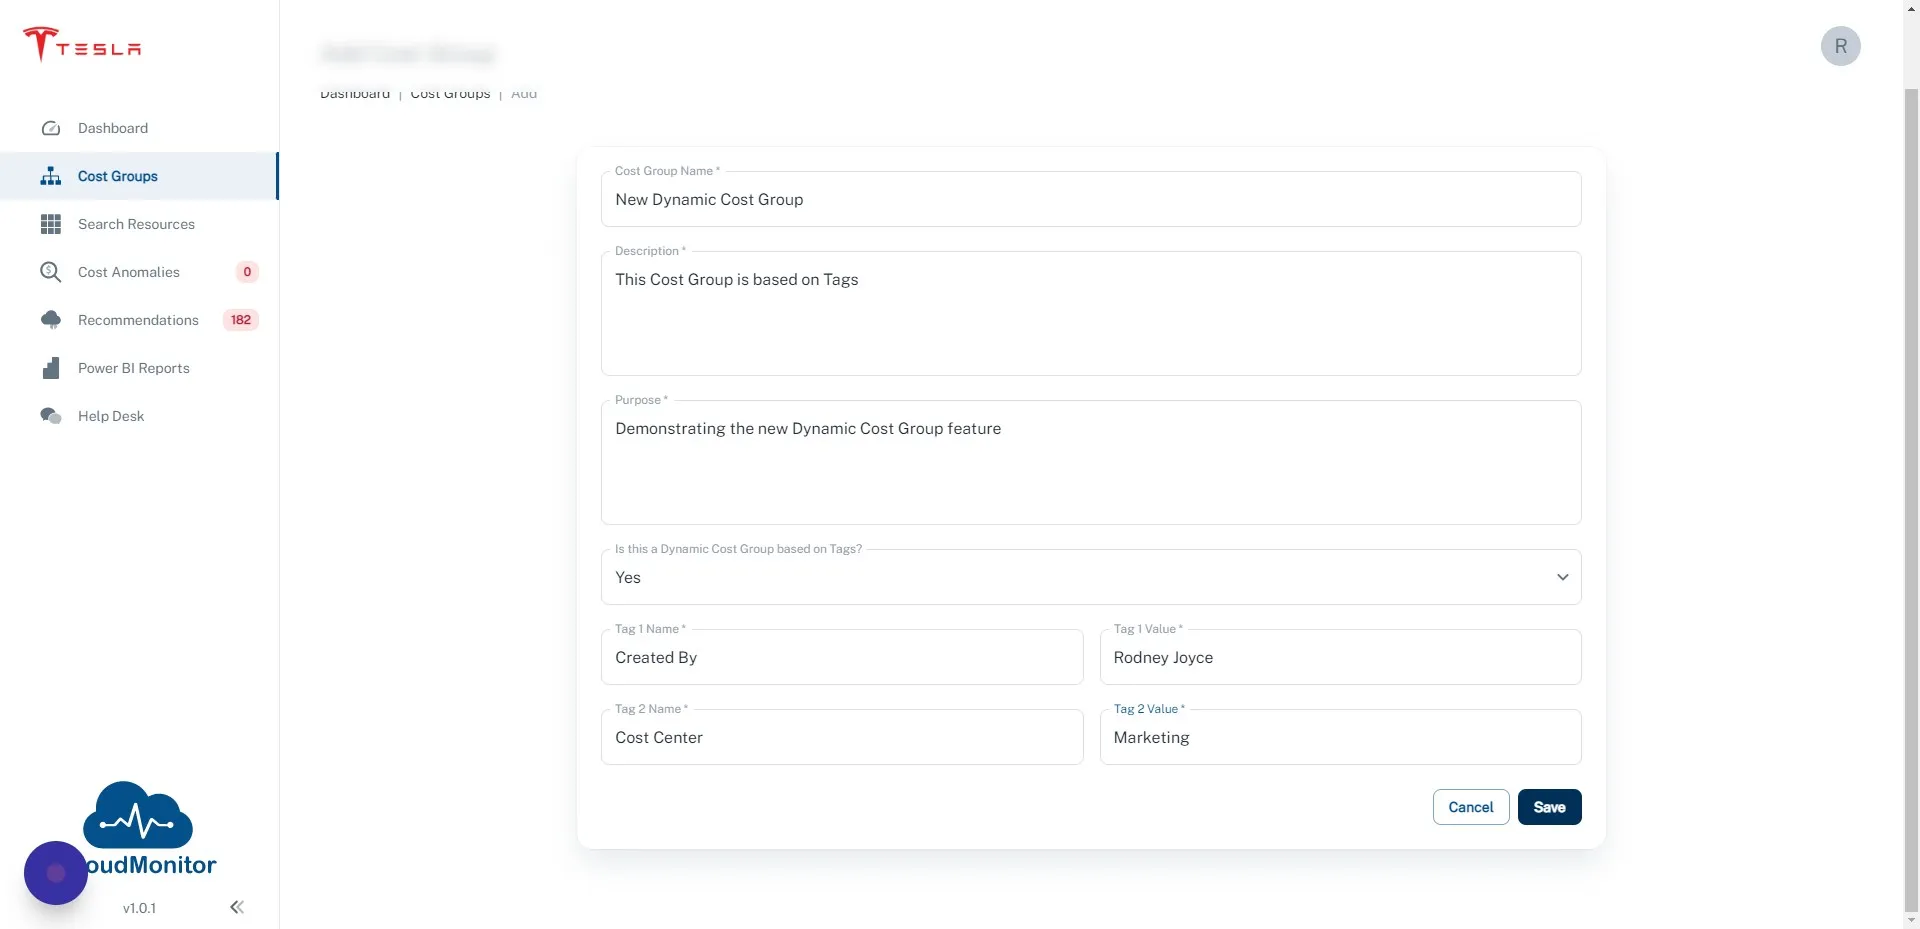
Step 6
Section titled “Step 6”Enter the Tag Name/Value pairs that you want to match on. You can enter 1 or 2 Tags. If you enter 2 Tags, the Resource Group must match on Tag 1 AND Tag 2
Step 7
Section titled “Step 7”Click “Save”
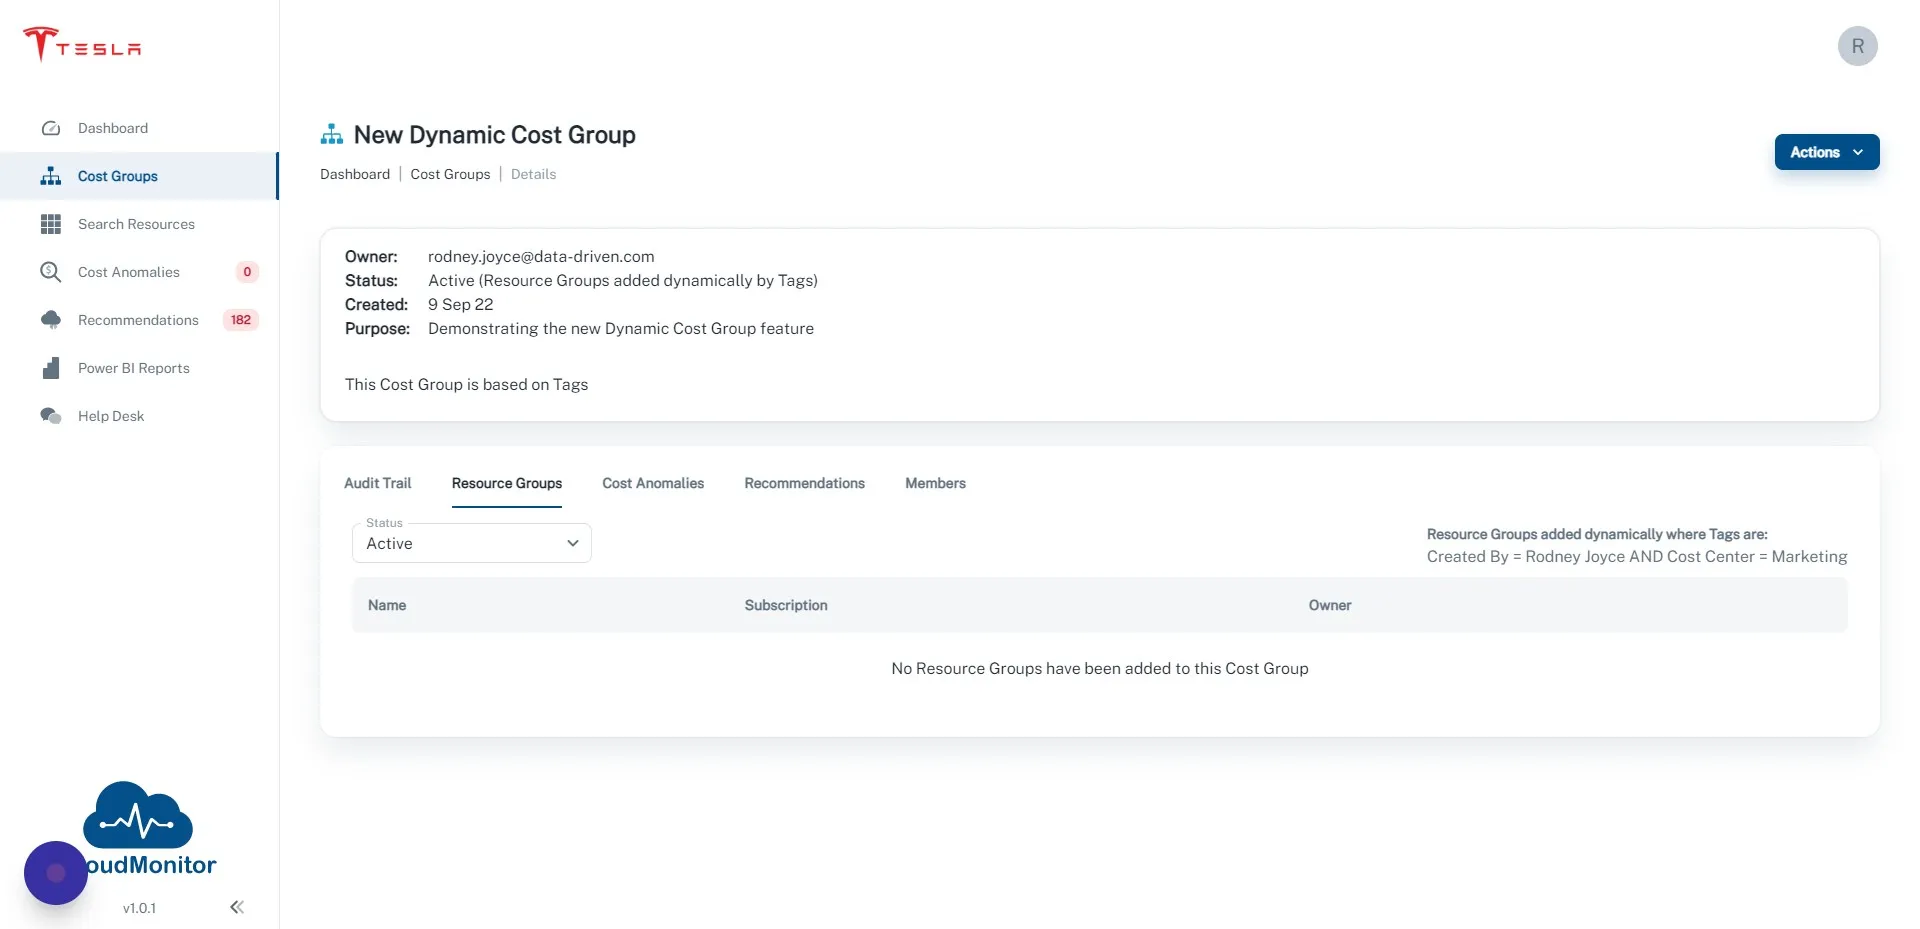
Step 8
Section titled “Step 8”Click on the “Resource Groups” tab
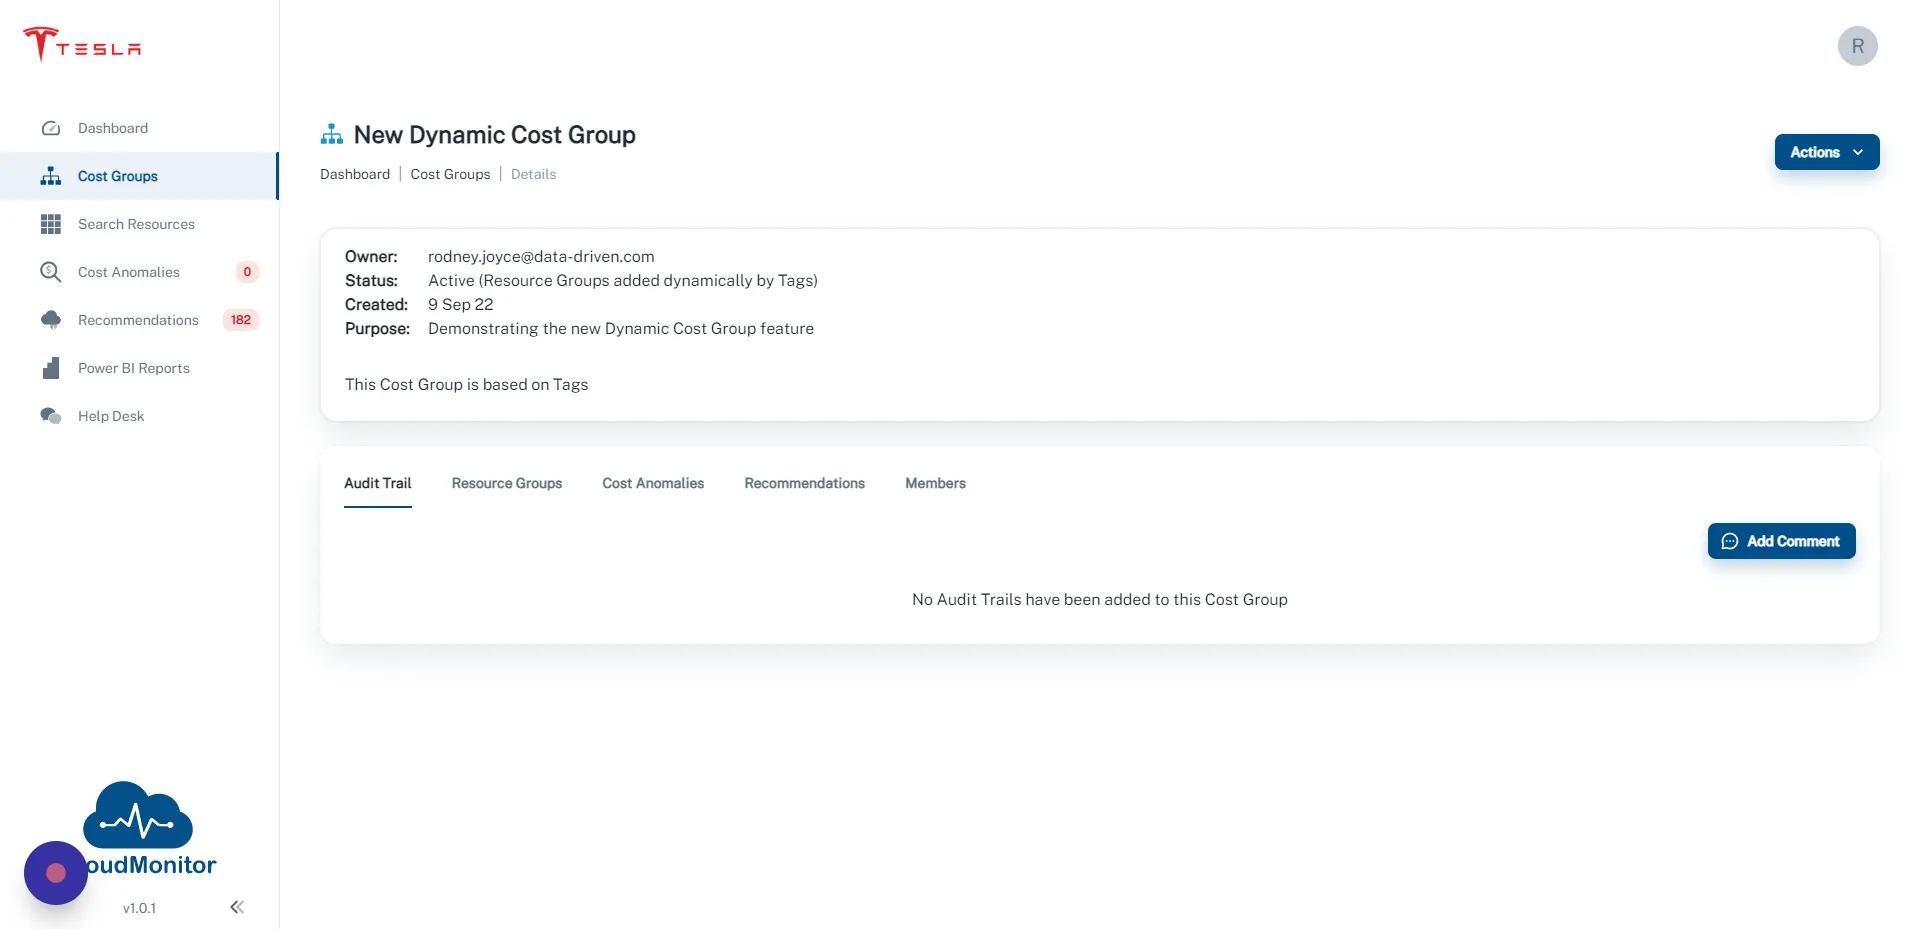
Step 9
Section titled “Step 9”After 8 hours all Resource Groups that match these tags will show up here. Refresh the Power BI Report to show the new Cost Group